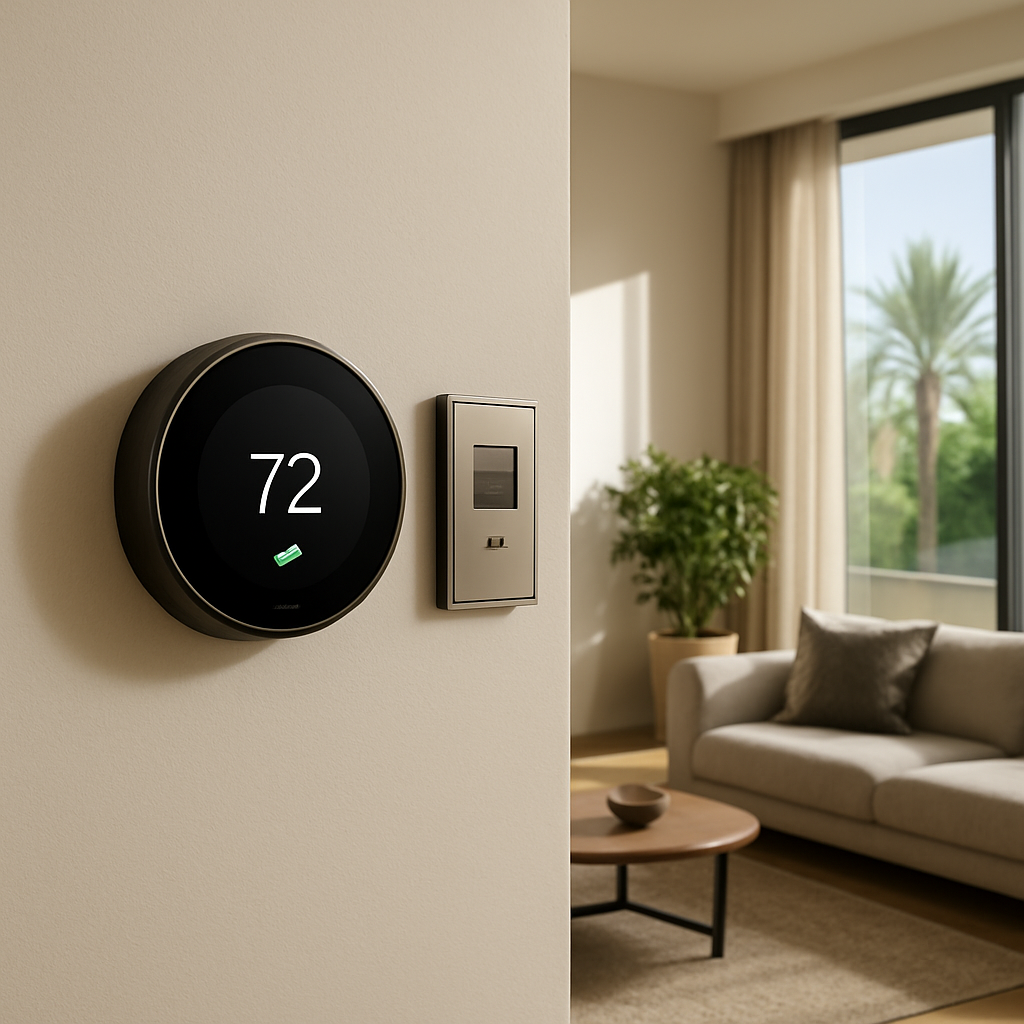
Picture this: you walk into your living room and the temperature instantly feels just right, no matter if the Dubai sun is blazing outside or a cool desert night is settling in.
That’s the promise of a smart thermostat, but getting it set up can feel like deciphering a tech manual written in another language.
So, why does smart thermostat installation matter for a luxury villa or a sleek downtown apartment?
First, it trims energy waste – the system learns when you’re home, when you’re away, and adjusts heating or cooling accordingly, which translates to lower bills and a greener footprint.
Second, comfort becomes effortless. Imagine coming back from work, and the house welcomes you with a gentle breeze or warm hug without you lifting a finger.
But there’s a catch: a half‑done install can leave you with connectivity glitches, dead zones, or a thermostat that talks to the wrong devices.
In our experience at Smart Citizens, we’ve seen a smooth installation hinge on three things: proper wiring, seamless integration with your existing hub, and precise calibration for your local climate.
That’s why we start every project by mapping your home’s electrical layout, confirming that the Wi‑Fi or Zigbee network reaches every corner, and running a quick test run before the final handover.
If you’re a homeowner who values both style and efficiency, ask yourself: do you want a thermostat that merely sits on the wall, or one that becomes the brain of your climate control?
Stick with us, and we’ll walk you through every step – from choosing the right model for your space to fine‑tuning schedules that match your lifestyle.
Ready to turn that imagined comfort into reality? Let’s dive into the details of smart thermostat installation and see how a few simple choices can transform your home.
TL;DR
Smart thermostat installation transforms your home into a responsive comfort zone, cutting energy waste while letting you set the perfect climate with a tap or voice command. Our proven three‑step approach—checking wiring, syncing with your hub, and calibrating for Dubai’s climate—ensures a glitch‑free setup that saves money and boosts daily convenience.
Step 1: Assess Compatibility with Your Dubai Property
Before you even think about swapping the old wall‑mounted dial for a sleek smart thermostat, pause for a second and ask yourself: does my home’s wiring, Wi‑Fi reach, and HVAC setup actually play nice with a connected device? It sounds obvious, but we’ve seen luxury villas where a mismatched voltage or a hidden thermostat hidden behind a marble column cause headaches that could’ve been avoided.
First thing on the checklist is the power supply. Most smart thermostats run on low‑voltage (24 V) control lines that feed from your HVAC’s furnace or air‑conditioning unit. If you’re living in a newly built Palm Jumeirah residence, chances are the wiring is already standardized. Older downtown apartments, however, might still have legacy wiring that needs a transformer or a professional rewiring job.
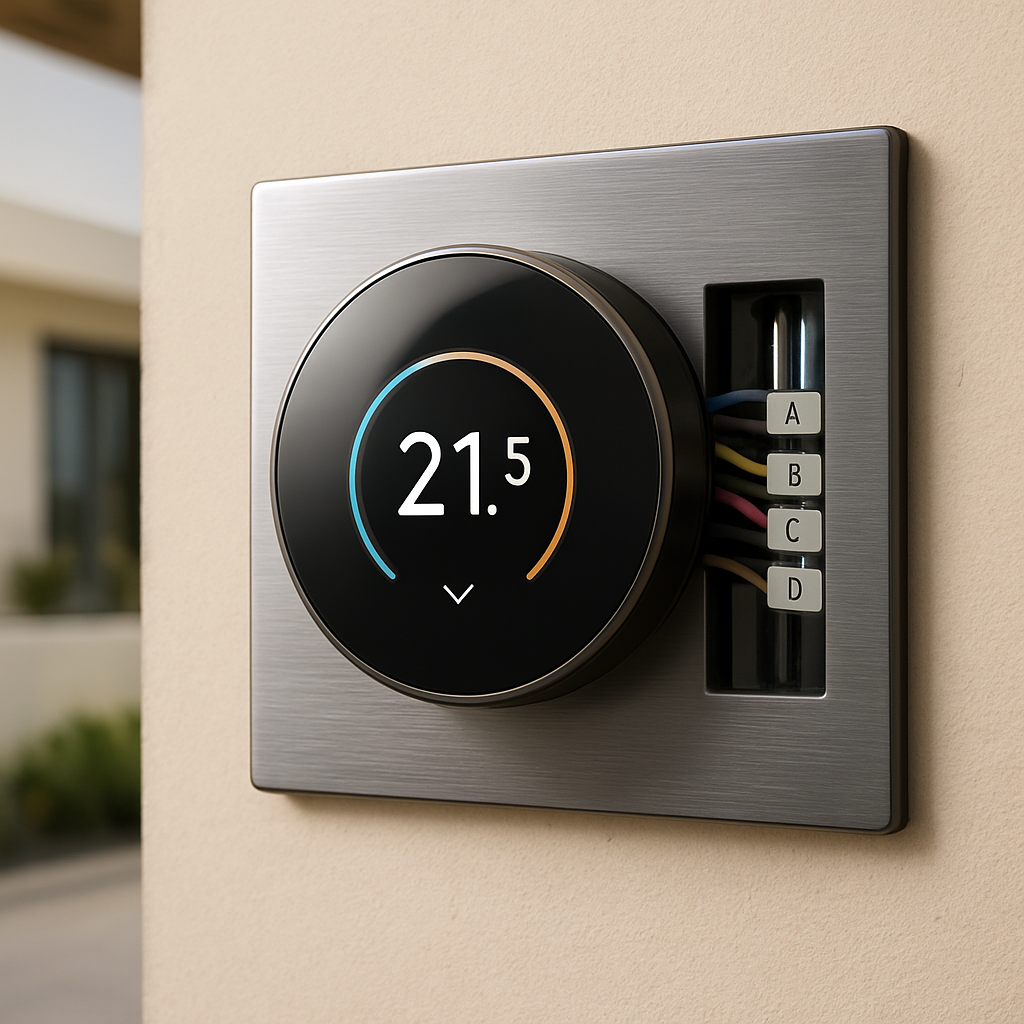
Verify the wiring type
Grab the existing thermostat’s back plate. You should see two wires labeled “R” (power) and “C” (common). If the “C” wire is missing, the thermostat won’t have a steady power source and will keep rebooting. In that case, you’ll either need to run a new common wire or opt for a model that includes a power‑extending kit.
Second, think about connectivity. Dubai’s high‑rise buildings sometimes have thick concrete walls that block Wi‑Fi. A smart thermostat needs a reliable signal to talk to your hub or smartphone. Walk around the house with your phone and check the signal strength near the location where the thermostat will sit. If you’re getting only one or two bars, consider a mesh extender or a Zigbee hub placed closer to the unit.
Check your HVAC compatibility
Not all HVAC systems are created equal. Central air‑conditioning units that use a variable‑speed compressor often have proprietary communication protocols. In our experience, models from Daikin, Mitsubishi and Carrier integrate smoothly with the major smart thermostat brands, while some older split‑systems might need a separate interface module.
Ask yourself: does the system support a “heat‑pump” mode, or is it strictly cooling? A thermostat that can’t tell the difference will waste energy trying to heat when there’s no heater attached. This is especially critical in Dubai, where you’ll be cooling most of the year and only heating during the rare winter evenings.
Third, look at the thermostat’s placement. It should be away from direct sunlight, drafts, and heat sources like lamps or kitchen exhausts. A spot on an interior wall, roughly at eye level, gives the most accurate reading. If you’re installing in a high‑ceiling villa, a wall‑mounted unit works better than a ceiling‑mounted sensor that could be affected by the sun’s glare.
Here’s a quick self‑audit you can run before calling a professional:
- Confirm the presence of both “R” and “C” wires.
- Test Wi‑Fi signal strength at the intended location (at least 3‑4 bars).
- Identify your HVAC brand and model; look up its smart‑compatible list.
- Choose a wall that stays out of direct sun and drafts.
If any of these items raise a red flag, don’t panic. It simply means you’ll need an extra step—like adding a common wire or installing a Wi‑Fi extender—before the thermostat can do its job.
Now that you’ve mapped out the basics, let’s see a real‑world scenario. Imagine you own a sleek apartment in DIFC with a central air‑conditioning system from Daikin. You check the back plate and find “R”, “C”, “Y” and “G” wires—all the usual suspects. Your phone shows a solid Wi‑Fi signal right where the thermostat will live, and the Daikin unit is listed as compatible on the thermostat manufacturer’s site. You’re good to go. Contrast that with a heritage villa in Al Fahidi, where the old thermostat only has “R” and “W” wires, and the Wi‑Fi drops to one bar on the third floor. In this case, you’d need a professional to run a new “C” wire and maybe add a mesh node to cover the upper levels.
All of this assessment is about avoiding surprise trips back to the installer after the thermostat is already on the wall. A smooth start means you’ll spend more time enjoying that perfect, AI‑driven climate and less time troubleshooting.
Ready for the next step? Once you’ve confirmed compatibility, we’ll walk you through the actual wiring and network sync.
Below is a short video that walks through the visual inspection of wiring and signal checks. It’s a quick watch that saves you a lot of guesswork.
Take a moment after the video to note any missing wires or weak signal spots. Jot them down; you’ll reference them when we move to the installation stage.

With your compatibility audit complete, you’re set to move forward confidently. Remember, the goal isn’t just to install a gadget—it’s to create a climate that adapts to your lifestyle, saves energy, and feels effortless.
Step 2: Gather Tools, Materials, and Professional Support
What you actually need on the wall
First things first – you can’t install a smart thermostat if you don’t have the right screwdriver, voltage tester, and a little patience.
Do you already have a spare C‑wire tucked away behind your old thermostat? If not, you’ll need a power‑bridge kit or a dedicated transformer.
Grab a flat‑head and Phillips screwdriver, a drill with a 6 mm bit, a wire stripper, and a non‑contact voltage detector. Trust me, those tools save you from accidental shocks and a trip to the electrician later.
Materials that make the job painless
Aside from the thermostat itself, keep a few extra bits handy: mounting screws, wall anchors for plaster or concrete, and zip ties to tidy up loose wires.
Most modern units, like the AE6607, work with a standard 24 V AC power supply. If your home runs on a mixed‑voltage system, a small 24 V AC adapter can bridge the gap.
And don’t forget the adhesive‑backed cable clips – they keep the wiring neat, which looks professional and helps the hub read the signals reliably.
When to call in the pros
Feeling uneasy about touching live wires? That’s a good sign. A certified installer can verify wiring integrity, set up the Wi‑Fi or Zigbee mesh, and configure the thermostat to speak with your smart home hub.
In Dubai’s high‑rise towers, many units use VRF (Variable Refrigerant Flow) systems that require a specific interface. A professional will know whether the AE6607 can hook directly into the VRF controller or if a gateway is needed.
Even if you’re confident, a quick site survey from an experienced technician can uncover hidden issues – like a missing ground wire or a weak Wi‑Fi spot that could cause dead zones later.
Checklist before you start
| Item | Why It Matters | Pro Tip |
|---|---|---|
| C‑wire (or power‑bridge kit) | Provides continuous power to the thermostat, preventing resets. | Label the C‑wire before disconnecting the old unit. |
| Voltage tester & non‑contact detector | Ensures the circuit is truly dead before you start pulling wires. | Test twice – once on the breaker and once on the terminals. |
| Professional installer (certified HVAC electrician) | Guarantees code‑compliant wiring and correct integration with HVAC. | Ask for a brief written report of the wiring diagram for future upgrades. |
Here’s a quick story: a client in Downtown Dubai thought they could skip the electrician because the old thermostat had a visible C‑wire. Turns out the wire was a stray that didn’t actually feed the unit. We installed a tiny power‑bridge, saved them a day, and the thermostat now runs flawlessly.
Another common scenario – a villa with a split‑system AC that only offers a red‑hot and white‑neutral. In that case, you either need a dedicated 24 V transformer or a professional to add a C‑wire at the furnace. The extra hardware costs a few hundred dirhams, but it prevents a thermostat that constantly loses connection.
So, what’s the smartest way to keep your budget in check while still getting a reliable install?
Start by inventorying what you already have. Pull out the old thermostat, snap a photo of the wiring, and note any labels. Then compare that list against the checklist above. Anything missing? That’s your shopping list.
If you’re unsure about any step, pause and book a short consultation with a local Smart Citizens technician. A 30‑minute site visit usually uncovers the missing pieces faster than an hour of trial‑and‑error on your own.
Finally, remember that the tools you use become part of your long‑term maintenance kit. Keep the screwdriver, wire stripper, and voltage tester in a labeled drawer near your thermostat. When the next upgrade rolls around – maybe a new sensor or an integration with a lighting scene – you’ll be ready.
Need a reliable reference for the exact wiring layout? The official Nest installer guide walks you through each terminal and even shows how to add a power‑bridge if your C‑wire is missing.Nest Pro Installer Guide
Step 3: Wiring and Physical Installation
First thing’s first – shut off the power at the breaker. It sounds obvious, but I’ve seen too many DIYers keep the HVAC live and end up with a shocking surprise. A quick snap of the switch guarantees you’re working in a safe zone.
Next, pull the old thermostat off the wall. Most faceplates pop with a gentle pry, but keep an eye out for hidden screws – they love to hide behind the cover. Snap a photo of the wiring before you disconnect anything; that picture will become your cheat‑sheet when you match colors to terminals later.
Now comes the wiring drama. Identify the red (R), white (W), yellow (Y) and, most importantly, the C‑wire (common). If you have a C‑wire, you’re golden – the thermostat will draw continuous power and you won’t need a hacky battery. In many Dubai villas, especially older ones, the C‑wire is missing. In that case, you have two solid options: run a new low‑voltage cable from the furnace, or use an add‑a‑wire adapter that tricks the system into thinking a C‑wire exists. Our technicians often recommend the adapter for quick installs, but a proper run is the cleanest long‑term solution.
Once you know what you have, label each wire with the stickers that came with the new thermostat (or a piece of masking tape). This tiny habit saves you from the “which wire goes where?” panic that can turn a 30‑minute job into an hour of guessing.
Time to mount the backplate. Use a pencil to mark the screw holes, drill pilot holes, and slap in wall anchors if you’re hitting plaster or concrete. Pull the wires through the backplate before you tighten the screws – it’s far easier than trying to fish them later. A snug but not overtightened backplate ensures the thermostat sits flush and looks professional.
With the backplate secured, connect each wire to its matching terminal. Red to R, white to W, yellow to Y, and the blue or black wire to C. Double‑check each connection; a loose wire can cause intermittent loss of connection, which is the bane of smart‑thermostat users. When you’re satisfied, snap the new faceplate onto the backplate. If the plate won’t sit right, make sure no stray wire is snagging underneath.
Now flip the breaker back on. The thermostat should power up like a smartphone – a brief boot screen followed by the welcome wizard. If the screen stays black, double‑check the C‑wire and make sure the thermostat is getting 24 V AC. A quick multimeter test can save you a call to the electrician.
Before you finish, think about integration. A smart thermostat works best when it talks to your lighting system. Imagine your living room lights dimming automatically when the thermostat detects you’re leaving for work. For that seamless experience, consider pairing with professional outdoor lighting specialists – LED Artistry’s lighting design services can coordinate fixtures with climate control for energy‑savvy homes.
Finally, run the setup wizard on the thermostat or its companion app. Connect to Wi‑Fi, name your device, and let the system learn your schedule. In our experience, a quick 5‑minute calibration yields a noticeable drop in the next electricity bill – especially in the scorching Dubai summer when the HVAC works overtime.
Here’s a quick checklist you can print out and stick on your toolbox:
- Turn off breaker.
- Photo the existing wiring.
- Label wires.
- Verify presence of C‑wire or plan for adapter.
- Mount backplate with anchors.
- Connect wires to correct terminals.
- Secure faceplate.
- Restore power and test.
- Run Wi‑Fi setup.
Following this flow keeps the install smooth, safe, and future‑proof. If anything feels uncertain – especially when dealing with a missing C‑wire – don’t hesitate to call a certified Smart Citizens technician. A short site visit can save hours of trial‑and‑error and keep your warranty intact.
For a deeper dive into the wiring diagrams and step‑by‑step screenshots, check out the official Nest installation guide – it walks you through each terminal with crystal‑clear visuals.Nest Learning Thermostat Install Guide (PDF). And if you prefer a consumer‑report perspective, the Consumer Reports smart thermostat install article offers handy troubleshooting tips.
Step 4: Configure, Connect to Wi‑Fi, and Optimize Settings
Alright, you’ve got the thermostat mounted and wired. The next move feels a bit like pairing a new phone – you just need to tell it how to talk to your home network and fine‑tune a few settings so it behaves exactly the way you want.
Power up and launch the onboarding wizard
Flip the breaker back on and watch the screen light up. Most units will greet you with a friendly “Welcome” and immediately prompt you to select your language and region. Choose “UAE” so the device applies the correct climate defaults for Dubai’s scorching summers and mild winters.
Does the thermostat ask you to press a button on the backplate? That’s the “reset” or “pairing” button – hold it for a few seconds until the Wi‑Fi icon starts blinking. This signals the unit that it’s ready to join a network.
Finding the right Wi‑Fi band
Here’s a quick reality check: many smart thermostats only support the 2.4 GHz band. If your router is set to dual‑band, make sure the 2.4 GHz SSID is visible. The 5 GHz band looks faster, but the thermostat’s antenna is tuned for longer range, not speed.
Tip: give your network a simple name (no spaces or special characters) – something like “DubaiHome‑2.4G”. It avoids the dreaded “cannot connect” error that shows up when the device trips over a complex SSID.
Entering credentials safely
When the on‑screen keyboard appears, type your Wi‑Fi password exactly as you set it. It’s easy to mistype a capital letter or a stray space, and the thermostat will just keep trying without any clear feedback. If you’re unsure, pull up your router’s admin page on your phone and copy‑paste the password into a notes app first.
Once the connection succeeds, the thermostat will display a green checkmark and ask you to confirm the location of the device – usually “Living Room” or “Master Bedroom”. Naming it correctly helps voice assistants and the Smart Citizens app keep things organized.
Linking to your Smart Home hub
Now that the thermostat talks to the internet, it can talk to the rest of your smart home. Open the Smart Citizens app, tap “Add Device”, and select “Thermostat”. The app will search for the newly‑online unit, pull its serial number, and prompt you to assign it to a zone.
If you have a Zigbee or Matter hub already running, the app will automatically create the bridge. In most luxury villas, we see the hub installed in the utility room, where it can reach every corner of the property without dead spots.
Calibration and schedule setup
Before you walk away, run the built‑in calibration routine. The thermostat will ask you to set a “Current Temperature” and a “Desired Temperature”. This tiny step lets the device learn the exact offset of your HVAC sensors – something that can vary between brands.
Next, sketch a simple schedule. For Dubai, a common pattern is:
- 6 am – 24 °C (pre‑cool before you leave for work)
- 9 am – 28 °C (away mode)
- 5 pm – 24 °C (cooling before you return)
- 11 pm – 26 °C (night comfort)
You don’t have to be a scheduling wizard; the app offers “Smart Away” and “Eco” modes that automatically adjust based on motion sensors or geofencing. Enable them, and you’ll see a noticeable dip in your next electricity bill.
Fine‑tuning Wi‑Fi stability
Even after a perfect setup, Wi‑Fi hiccups happen. If you notice the thermostat disconnecting after a few days, try these quick fixes:
- Move the router a few metres closer to the thermostat, or add a mesh node on the same floor.
- Give the thermostat a static IP address in your router settings – this prevents it from “changing seats” on the network.
- Disable any “AP‑Isolation” feature that blocks devices from talking to each other.
And remember, a weak signal shows up as a gray Wi‑Fi icon on the thermostat’s display. When you see that, it’s time to adjust the network rather than blame the thermostat.
Final sanity check
Take a moment to walk through each step in the app’s “Diagnostics” tab. You should see green lights for Power, Wi‑Fi, and Cloud Connectivity. If everything’s green, you’ve successfully completed Step 4.
Feeling confident? Great. If anything feels off, don’t hesitate to schedule a quick site survey with a Smart Citizens technician. A 30‑minute visit can pinpoint hidden wiring quirks or network blind spots before they become costly problems.
Now you’re ready to let your thermostat do the heavy lifting – learning your routine, trimming energy waste, and keeping your villa perfectly comfortable, rain or shine.
Step 5: Test, Troubleshoot, and Schedule Ongoing Maintenance
Now that the thermostat is online, the real test begins. You’ve just finished the wiring, the Wi‑Fi handshake, and the first schedule – but does it actually keep your villa comfortable without you hovering over the app?
The easiest way to find out is to run the built‑in diagnostics. Open the Smart Citizens app, tap the device tile, and look for the green checkmarks under Power, Network, and Cloud. If any of those lights stay amber, you’ve caught a problem before it turns into an annoying reboot later.
Run the first diagnostics
Start with a simple temperature check. Set the thermostat to a modest 24 °C, step away for ten minutes, then return and compare the reading on the wall with a reliable room thermometer. A difference of more than 1 °C usually signals a wiring loose‑end or a sensor that needs recalibration.
Next, fire up the “Schedule Test” in the app. It will simulate an away‑mode cycle, lower the set‑point, and then raise it back up. Watch the status bar – a smooth transition without the Wi‑Fi icon flashing gray means your network is solid.
Common hiccups and quick fixes
One of the most common gremlins is a disappearing Wi‑Fi icon. If you see a gray signal, try moving the router a few metres closer or adding a mesh node on the same floor. Giving the thermostat a static IP address in your router’s DHCP table also stops it from “changing seats” and losing cloud sync.
Another frequent issue is a phantom C‑wire warning. Even if you wired a dedicated common, the thermostat may still report low voltage if the transformer is overloaded. A quick multimeter test across the C and R terminals should read close to 24 V AC. If it drops below 20 V, swap the transformer for a higher‑capacity one – a 24 V, 40 VA unit is a safe bet for most Dubai villas.
Sometimes the HVAC system itself throws a “filter needs cleaning” alert. That isn’t a thermostat fault, but ignoring it will cause the unit to work harder and can trigger false temperature spikes. A quick visual check of the filter and a gentle brush‑out often restores normal performance.
When to call a Smart Citizens technician
If the diagnostics still show a red warning after you’ve tried the above steps, it’s time to bring in a pro. Our certified installers can verify that the low‑voltage wiring meets UAE code, confirm that the thermostat is speaking the right protocol to your VRF controller, and fine‑tune the PID settings that control how fast the system reacts to temperature changes.
We’ve seen cases where a hidden ground fault caused intermittent resets – something you can’t see with a standard voltage tester. A technician will use a clamp‑meter and a thermal camera to locate the fault before it fries the board.
Set up a maintenance rhythm
Smart thermostat installation isn’t a set‑and‑forget project; it’s a living system. Schedule a quick check‑up every three months: open the app, glance at the “Health” dashboard, and verify that the last firmware update was applied. If the firmware version is older than 30 days, push the update – manufacturers release security patches that keep the cloud connection safe.
Add a seasonal task to your calendar. In Dubai, the summer heat can push outdoor temps past 45 °C, so before the peak season run a “Calibrate Outdoor Sensor” routine. In winter, lower the dead‑band to avoid short‑cycling the heat pump. A 5‑minute tweak now saves you a handful of service calls later.
Finally, consider enrolling in our ongoing support plan. For a modest annual fee, we’ll perform a remote health check, replace any worn‑out power‑bridge, and send you a reminder when it’s time to clean your HVAC filters. Think of it as a subscription for peace of mind – the kind of thing that keeps your smart home humming quietly in the background.
If you prefer a thermostat that also pushes real‑time performance alerts to your phone, take a look at the Freeze® Smart Thermostat, which offers proactive monitoring and direct technician messaging.
With these tests, quick fixes, and a regular maintenance schedule, your smart thermostat will stay reliable, energy‑smart, and ready to keep your Dubai villa comfortable year‑round.
FAQ
What’s the first thing I should check before starting a smart thermostat installation?
Turn off the breaker and snap a photo of the existing wiring. That picture becomes your cheat sheet when you match colors later. Make sure you have a C‑wire or a power‑bridge kit ready – without a steady 24 V source the thermostat will keep rebooting. A quick voltage test on the R and C terminals confirms you’re actually getting around 24 V AC.
Can I install a smart thermostat myself in a Dubai villa, or do I need a certified electrician?
You can handle the mounting and Wi‑Fi pairing if you’re comfortable with basic tools, but the low‑voltage wiring often trips local code. In our experience, a certified HVAC electrician saves you a day of guesswork, especially with VRF systems that need a specific interface. If you spot any missing ground or overloaded transformer, call a pro – it protects your warranty and keeps the installation TDRA‑compliant.
My Wi‑Fi is 5 GHz only. Will the thermostat still work?
Most smart thermostats speak the 2.4 GHz band because it reaches farther through walls. If your router broadcasts only 5 GHz, create a separate SSID for 2.4 GHz or add a cheap dual‑band extender. Give the network a simple name – no spaces or special characters – and you’ll avoid the “cannot connect” loop that frustrates many DIY installs. You can also place a small Wi‑Fi repeater halfway between the router and thermostat to boost signal strength without rewiring.
How often should I update the thermostat’s firmware?
Treat firmware like a security patch for your home. Check the cloud dashboard every month; if the version is older than 30 days, push the update. New releases often fix connectivity bugs and add climate‑aware algorithms that save a few kilowatts during Dubai’s scorching summer. A quick reboot after the update confirms everything’s humming along. If you’re unsure whether the update succeeded, open the device info page and verify the build number matches the release notes.
What’s the best way to calibrate temperature sensors after installation?
Run the built‑in calibration routine in the app. Set the “Current Temperature” to what a reliable room thermometer reads, then enter your desired set‑point. The thermostat will store the offset and adjust future readings. For outdoor sensors, repeat the step on a shade‑protected spot during a mild day – it prevents the unit from over‑cooling when the sun peaks at 45 °C.
How can I avoid the thermostat resetting when the power blips?
Secure a dedicated 24 V, 40 VA transformer or use a quality power‑bridge that supplies continuous power. If you rely on a shared HVAC transformer, make sure it isn’t also feeding the air‑handler fan, which can cause voltage dips. Adding a small UPS or a battery‑backed bridge gives the thermostat a safety net during brief outages. A compact 5 V USB power bank can serve as a temporary backup while you source a permanent transformer.
Is there a maintenance routine I should follow to keep the system reliable?
Schedule a quick health check every three months in the app – look for green icons under Power, Network, and Cloud. Clean or replace HVAC filters before the summer rush, and run a “Calibrate Outdoor Sensor” task right before the heat spikes. A short 5‑minute review now prevents costly service calls later, and it keeps your smart home running smoothly year‑round. Don’t forget to log the date in your home‑maintenance calendar so you never miss the next check.
Conclusion
By now you’ve seen how a careful smart thermostat installation can turn a chaotic DIY project into a smooth, future‑proof upgrade.
If you’ve ever felt the panic of a blinking Wi‑Fi icon or a thermostat that keeps resetting, you know the frustration is real.
The key takeaways? Start with a solid power plan – a dedicated 24 V, 40 VA transformer or a reliable power‑bridge eliminates the dreaded power blips.
Next, verify your C‑wire (or add a bridge) before you even lift the old faceplate. A quick photo of the existing wiring saves hours of guesswork.
Then, treat the network like a lifeline. Test the signal at the mounting spot, and if it drops below –70 dBm, add a mesh node or run an Ethernet back‑haul. It’s a tiny step that prevents months of reconnect headaches.
Finally, schedule a three‑month health check in the Smart Citizens app. Green icons under Power, Network and Cloud mean you’re good to go; any amber warning is your cue to call a certified installer.
So, what’s the next move? Grab that checklist, book a short site survey with Smart Citizens, and let the experts fine‑tune the wiring and integration for you.
A well‑installed smart thermostat doesn’t just keep your Dubai villa comfortable – it trims energy bills, protects your HVAC, and gives you peace of mind all year round. Ready to make it happen?