
Ever walked into your living room and wondered why the electric bill looks like a small fortune, even though you barely turned on the lights?
You’re not alone. Many of our Dubai villa owners feel that pang of frustration when the numbers arrive, and they have no clue which appliance is the culprit. That’s the exact moment a whole home energy monitoring system becomes a game‑changer.
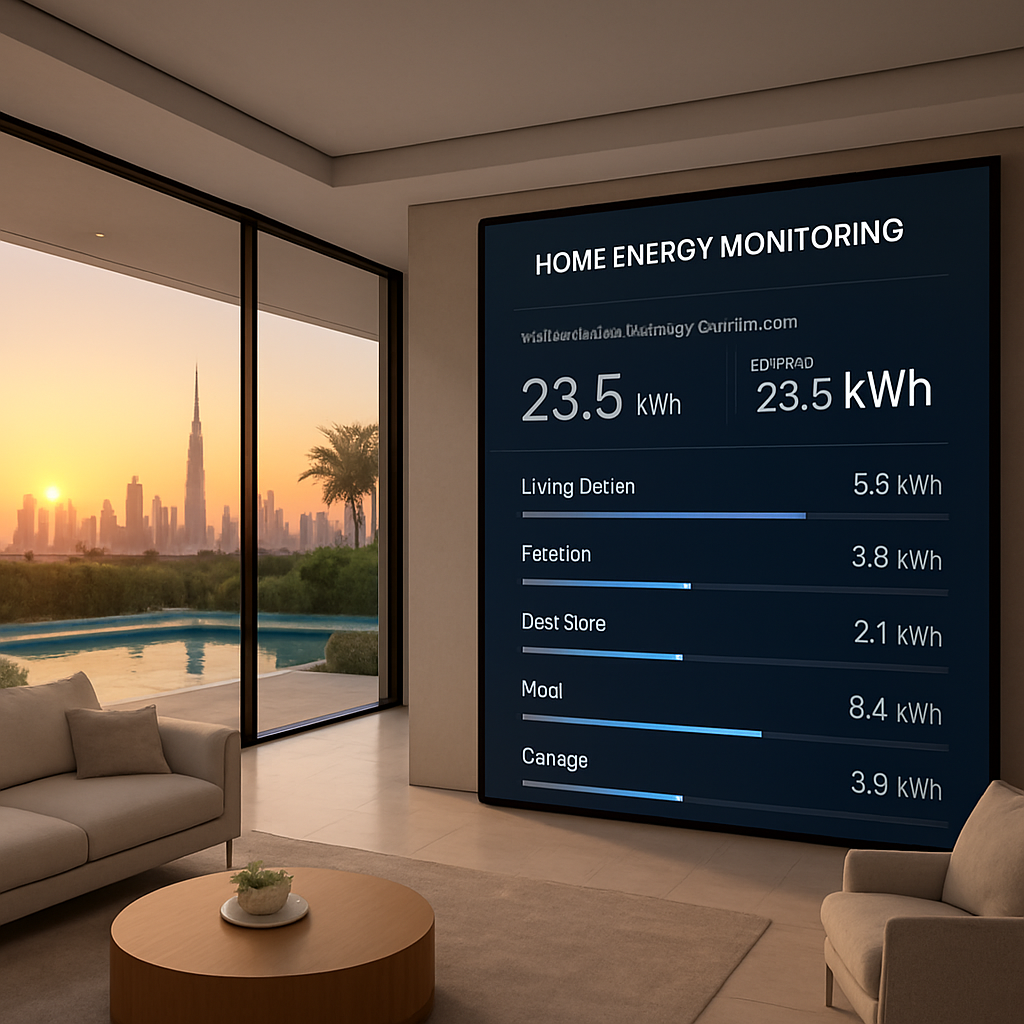
Think of it as a friendly detective that watches every socket, every switch, and every smart device in real time. It whispers to you which air‑conditioner is gobbling power at 2 am, or whether your pool pump is still running while you’re out for coffee. By turning invisible consumption into clear, visual data, you instantly see where waste hides.
In our experience, the biggest surprise for clients is how tiny habits add up. A single charger left plugged in can cost a few dirhams a month, but multiplied across dozens of devices it becomes a noticeable chunk of the bill. A whole home energy monitoring system flags those “phantom loads” before they add up.
So, why does it matter? Beyond the obvious savings, you gain peace of mind. No more guessing games, no more surprise spikes on the meter. You can set automated alerts that ping your phone the moment consumption exceeds a threshold you define. It also feeds into smart home automation – imagine the system dimming lights or adjusting the thermostat automatically when it detects a surge.
But there’s more than just dollars. Reducing energy waste aligns with Dubai’s sustainability goals and helps you lower your carbon footprint without sacrificing comfort. It’s a win‑win for your wallet and the environment.
Now, picture this: you’re hosting a dinner party, the lights are just right, the temperature feels perfect, and you get a notification that your rooftop solar panels have generated enough excess energy to offset the evening’s usage. That’s the kind of insight a whole home energy monitoring system delivers.
If you’ve ever felt stuck in a cycle of high bills and uncertainty, it’s time to consider turning data into control. Let’s dive deeper into how the technology works, what components you need, and the steps to get started.
TL;DR
A whole home energy monitoring system turns hidden electricity waste into clear, real‑time data, letting you cut bills, boost comfort, and support Dubai’s sustainability goals.
By visualizing each appliance’s draw, you can set alerts, automate lighting or HVAC, and enjoy lasting peace of mind knowing your villa runs efficiently daily.
Step 1: Assess Your Property’s Energy Use
Before you even think about automating anything, you need to know where the electricity is actually going. Imagine trying to lose weight without ever stepping on a scale – you’d be guessing, right? The same idea applies to a whole home energy monitoring system.
First, pull your latest DEWA bill and jot down the total kilowatt‑hours (kWh) used over the past month. In many Dubai villas, the average residential consumption hovers around 1,500‑2,000 kWh per month, but luxury homes with multiple AC units can easily double that. Those numbers give you a baseline – the “starting line” for every improvement you’ll make.
Map the major loads
Walk through each room with a notebook (or your phone) and list the biggest energy hogs:
- Air‑conditioning – especially split units that run 24 hours in the summer.
- Pool pump and water feature circulation.
- Lighting – think of all the LED strips, pendant lights, and outdoor floodlights.
- Appliances – fridge, dryer, dishwasher, and any high‑wattage kitchen gadgets.
For each item, note the typical daily runtime. If you’re not sure, use a plug‑in power meter for a few days. In our experience, a villa in Palm Jumeirah with a 10 kW pool pump running 8 hours a day adds roughly 800 kWh to the monthly tally – a huge chunk that many owners overlook.
Identify phantom loads
Phantom or standby power is the silent thief that sneaks in when devices sit plugged in but appear off. Chargers, smart TVs, and even the home router can each draw 1‑5 W continuously. Multiply that by dozens of gadgets, and you’re looking at another 50‑100 kWh a month – enough to bump your bill by a few hundred dirhams.
One simple trick: after a weekend away, check your bill. If it spikes, phantom loads are likely the culprit. A quick “unplug‑everything and plug‑back in what you need” test can reveal the hidden waste.
Use a baseline monitoring tool
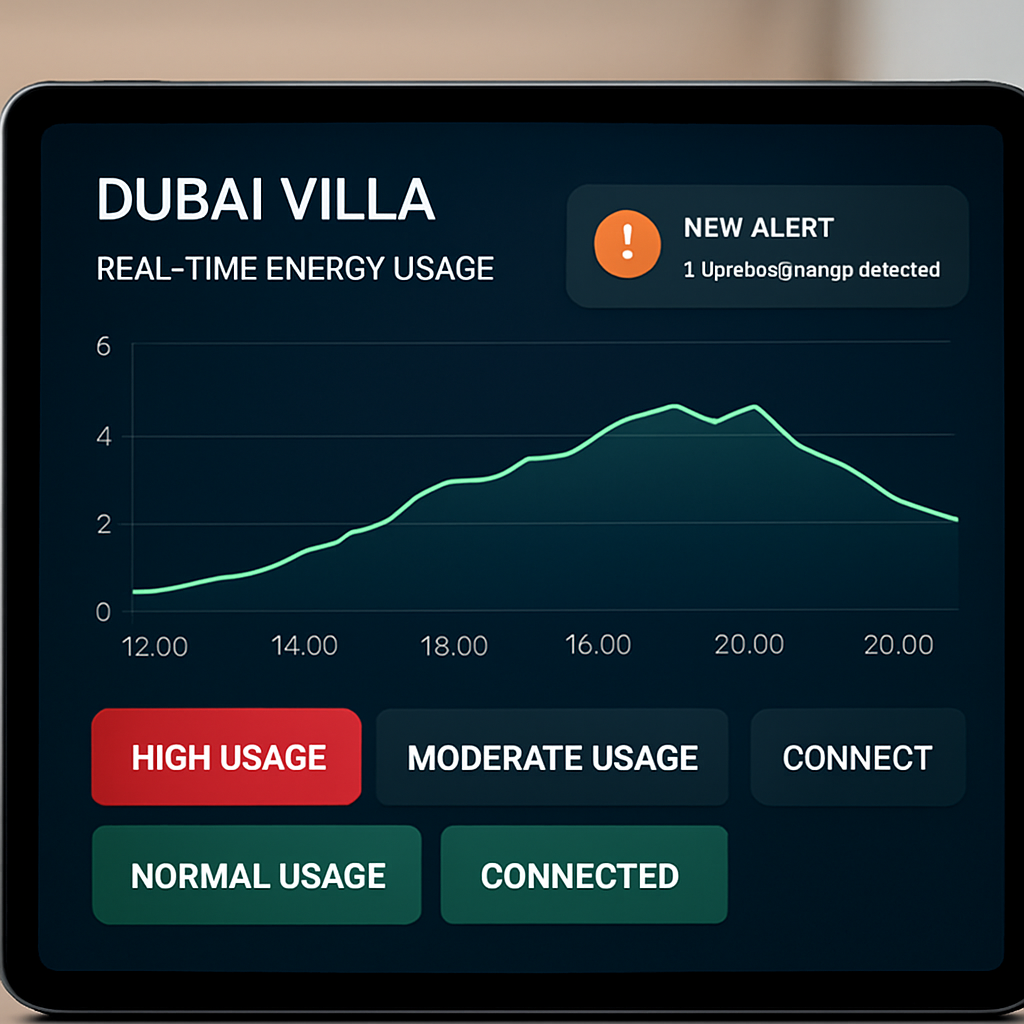
If you already have a whole home energy monitoring system installed, the dashboard will show you a real‑time breakdown by circuit. If not, start with a basic smart energy monitor that clamps onto your main service panel. It will give you a live graph of total consumption and let you set alerts for spikes.
When you see a sudden jump at 2 am, ask yourself – which unit is still humming? Is the pool pump on a timer? Did someone forget to turn off the balcony lights? Those instant insights are what turn data into action.
Action checklist
Grab a sheet and run through this quick audit:
- Collect the last three DEWA bills – calculate average monthly kWh.
- List all high‑consumption devices and estimate their daily runtime.
- Measure standby draw for chargers, TVs, and routers with a plug‑in meter.
- Install a whole‑home monitor or a single‑circuit clamp to verify your estimates.
- Set a “baseline alert” – a notification when usage exceeds 5 % above your average.
Once you have those numbers, you can move on to the next step: pinpointing the exact appliances that need optimization. And if you’re wondering where to get a reliable monitoring platform, check out Smart Energy Management In Dubai | Save Energy And Reduce Costs – they specialize in turning those raw figures into actionable insights for luxury villas.
Remember, the goal isn’t just to cut the bill; it’s to create a comfortable home that runs efficiently without you having to micromanage every switch. With a solid baseline, you’ll know exactly where to focus your smart automation investment.
Step 2: Choose Certified Smart Sensors and Meters
Alright, you’ve got your baseline numbers, now it’s time to pick the eyes and ears that will actually watch the electricity flow. The trick isn’t just buying the cheapest sensor – it’s about choosing certified hardware that talks to your whole home energy monitoring system without a hiccup.
Why certification matters
In Dubai, the TDRA (Telecommunications and Digital Government Regulatory Authority) sets strict standards for IoT devices. A certified sensor guarantees two things: reliable data accuracy and seamless integration with the local grid. Without that seal, you might end up with a device that drifts a few percent off, and those “few percent” can mean hundreds of dirhams over a year.
Think about it like this: you wouldn’t trust a cheap thermostat to keep your villa at the perfect 24 °C during a scorching summer, right? The same logic applies to energy sensors.
Start with the mains – the whole‑home monitor
The first piece of the puzzle is a main‑panel clamp that measures total consumption in real time. Look for a unit that supports 400 A service – many luxury villas run on that size. Once installed, you’ll see a live graph of every kilowatt‑hour your home draws, and you can set alerts for spikes that exceed your baseline.
One solid option on the market is the Emporia Vue Energy Monitor. It clips onto the service panel, offers up to 16 circuit‑level sensors, and streams data to a cloud dashboard you can check on your phone. The Vue even flags “unusual activity” – perfect for catching a rogue pool pump that’s forgotten to turn off.
Pick circuit‑level sensors for the heavy hitters
After you’ve got the big picture, you’ll want granular data on the appliances that chew up the most power. Split‑unit ACs, water heaters, and pool pumps each deserve their own sensor. When you attach a 50 A current sensor to the breaker that feeds the master AC, the monitor will tell you exactly how many kilowatt‑hours that unit uses each day.
Here’s a quick checklist for picking the right sensor:
- Certification: Look for CE or UL markings and TDRA approval.
- Current rating: Match the sensor to the breaker size (50 A, 100 A, etc.).
- Wireless protocol: Zigbee, Z‑Wave, or Wi‑Fi – choose what your hub supports.
- Future‑proofing: Sensors that can be added to a second panel later on.
Most vendors bundle a starter pack of sensors; you can always expand as you add new circuits.
Integrate with a smart hub
All those sensors need a brain. A certified smart hub will collect the data, run the analytics, and push notifications to your phone. Control4’s platform is a good example of a hub that speaks to thousands of third‑party devices while keeping everything under a single app Control4. When you pair the hub with your certified sensors, you can create automations like “If the pool pump runs more than 2 hours after sunset, shut it off and send me a text.”
Because Control4 is a certified integrator network, you’ll get a local installer who knows the Dubai code, does the wiring safely, and configures the scenes for you.
Now, let’s see a short video that walks through a typical sensor‑installation flow in a luxury villa.
Notice how the installer clamps the sensor onto the main breaker, then pairs it with the hub via a simple QR code. The whole process takes less than an hour, and you’re instantly looking at live data.
Don’t forget the “soft” sensors
Not every load lives behind a breaker. Smart plugs are perfect for lamps, chargers, and low‑power devices that draw under 15 A. Plug one into the kitchen outlet, label it “Coffee Maker,” and watch the app tell you how many kilowatt‑hours that single appliance uses each month.
These plug‑in meters are also handy for spotting phantom loads – the sneaky 2‑W draw from a TV standby mode that adds up over weeks.
Action checklist – choose your certified kit
- Verify TDRA certification on any sensor you consider.
- Start with a 400 A whole‑home monitor (e.g., Emporia Vue).
- Add circuit‑level sensors for AC, pool pump, water heater, and any high‑draw breaker.
- Select a compatible smart hub (Control4 is a proven, certified option).
- Round out with smart plugs for standby‑load hunting.
- Schedule a certified installer to do the panel work and integration.
When you follow these steps, you’ll have a reliable, future‑ready whole home energy monitoring system that not only shows you where the juice is going but also gives you the tools to act on it.
Step 3: Integrate with Your AI‑Powered Home Automation Hub
Now that the sensors are humming and you can see each circuit’s draw, the real magic happens when you let a smart hub talk to them.
Think of the hub as the brain‑child of your whole home energy monitoring system – it gathers the raw numbers, runs AI‑driven rules, and then decides what to do next. That’s why the integration step feels like the moment you finally plug the power cord into a new laptop.
Pick a hub that speaks your language
If you’re in Dubai and want a solution that’s already TDRA‑certified, many installers recommend the Control4 whole‑home automation platform. It supports Zigbee, Z‑Wave and Wi‑Fi sensors, and its AI layer can flag abnormal spikes before they hit your bill.
Connect the sensors
1. Open the hub’s companion app and go to “Add Device”.
2. Scan the QR code on each sensor’s back – the same code you used during the panel install.
3. Assign the device to a room or zone (e.g., “Master Bedroom AC”). This naming helps the AI understand typical usage patterns.
4. Verify the live feed: you should see a real‑time wattage number appear next to the device name.
Tip: Do a quick “baseline test” by running the AC for an hour and watching the graph. If the numbers look off, re‑pair the sensor or check the breaker connection.
Set up AI‑driven automations
Here’s a simple workflow you can copy‑paste into the app’s automation editor:
- Trigger: Total home load > 12 kW for more than 10 minutes.
- Condition: It’s after sunset and the pool pump is on.
- Action: Send a push notification “High load detected – consider turning off the pool pump” and optionally dim the living‑room lights by 30 %.
Because the hub learns your routines, the next time it sees a similar pattern it can automatically dim lights or lower the thermostat without you lifting a finger.
Integrate with solar and battery storage
If your villa already has rooftop PV panels, link the inverter’s output to the hub. The AI will then decide when to draw from the grid versus when to use stored solar, keeping your DEWA bill as low as possible.
Example: During a hot afternoon the system sees the PV output at 8 kW and the AC demanding 10 kW. It can pull the extra 2 kW from a battery bank, avoiding a grid‑import surcharge.
Test, tweak, and trust
Run a weekend “simulation”: turn off non‑essential loads, let the hub run its automations, and watch the dashboard. Note any false‑positive alerts and adjust the threshold or add a “quiet hours” rule.
When everything feels smooth, schedule a short check‑in with your installer. A certified technician can confirm firmware versions and back‑up your automation scripts.
By the end of this step you’ll have a fully integrated, AI‑powered whole home energy monitoring system that not only tells you where the juice is going, but also takes action to keep your comfort high and your bill low.
Ready to see it in action? Our team can walk you through a live demo and tailor the automations to your villa’s unique layout.
Finally, set a monthly review reminder in the hub. A quick glance at the energy trends lets you spot new waste before it becomes a bill shock, and you can fine‑tune automations as your lifestyle changes.
Step 4: Compare Monitoring Platforms and Pricing
Now that the sensors are talking to your hub, the next decision is which whole home energy monitoring system actually gives you the insight you need without breaking the bank.
You’ve already felt the frustration of a surprise DEWA bill, so you’ll want a platform that translates raw kilowatt‑hours into clear, actionable alerts.
What to compare
First, line up the basics: data granularity, real‑time dashboards, and AI‑driven recommendations. A system that only shows a daily total is useful, but one that breaks usage down by circuit or even by individual appliance lets you spot that rogue pool pump in minutes.
Next, check integration depth. Does the platform speak natively to your Control4 hub, Zigbee switches, and smart plugs? The smoother the handshake, the fewer custom scripts you’ll need later.
Finally, look at support and warranty. In a luxury villa a missed firmware update can mean lost data, so a vendor that offers local, TDRA‑approved service technicians is worth the extra dirham.
Pricing models you’ll encounter
Most providers bundle hardware and software in one of three ways.
- Up‑front purchase. You pay for the monitor, sensors and a licence that never expires. It feels like a big hit to cash flow, but long‑term you avoid recurring fees.
- Subscription‑only. The hardware is supplied at a low cost or even free, and you pay a monthly or annual fee for cloud analytics and AI alerts. This works well if you prefer predictable budgeting.
- Hybrid. A modest hardware cost plus a low‑rate subscription for premium features like predictive load shifting or battery‑optimisation.
When you add installation, wiring and calibration, the total cost of ownership often spreads over three to five years. That’s the number you should compare, not the sticker price of a single monitor.
Quick decision checklist
- Does the dashboard show real‑time kW, daily totals and per‑circuit breakdowns?
- Is the app available on iOS and Android with push‑notification support?
- Can you set custom thresholds that trigger actions in your existing hub?
- What’s the minimum subscription term, and does it include firmware updates?
- Are local service contracts covered under warranty?
Answering “yes” to most of these points usually means you’ve found a platform that balances insight and cost.
Sample comparison table
| Feature | Option / Tool | Notes |
|---|---|---|
| Data granularity | Circuit‑level + appliance plugs | Identifies individual loads, ideal for luxury villas with multiple AC zones. |
| Pricing model | Hybrid – hardware + low‑rate subscription | Spreads cost, includes AI‑driven load‑shifting. |
| Integration | Native Control4, Zigbee, Z‑Wave | Seamless automation, no extra coding needed. |
In our experience, the hybrid model paired with a platform that talks straight to Control4 gives the best bang for your buck. You get the upfront hardware you’ll use for years, plus a subscription that keeps the AI smart enough to adapt as your villa’s usage patterns change.
So, how do you move forward? Grab a shortlist of three vendors, plug their specs into the table above, and run the checklist. Schedule a short demo – most providers will walk you through live dashboards and let you test the alert thresholds on the spot.
Remember, the cheapest option on paper often ends up costing more in hidden labor or missed savings. Aim for the solution that lets you see, act, and optimise every kilowatt, and you’ll keep your DEWA bill under control while enjoying a comfortable, future‑ready home.
Start comparing today and watch the savings grow.
Step 5: Deploy Real‑Time Analytics and Alerts
Now that the sensors are talking and your hub knows where every kilowatt is flowing, it’s time to turn that raw data into something you can act on instantly.
Real‑time analytics is the heartbeat of a whole home energy monitoring system. It takes the moment‑by‑moment readings from each circuit and translates them into a visual feed you can glance at on your phone or tablet.
Why does this matter? Because a spike that lasts just five minutes can add up to a few hundred dirhams on your DEWA bill if you never notice it. With live alerts, you get a gentle nudge before the bill shocks you.
Set up your dashboard
Open the app that came with your monitoring platform – most of them use a clean, tile‑based layout. Drag the “Total Load” widget to the top, then add individual circuit cards for the master AC, pool pump and any high‑draw appliances you flagged in Step 2.
If you prefer a more visual cue, switch the view to a colour‑coded heat map. Green means everything’s humming within the normal range, amber warns you’re approaching your preset threshold, and red flashes the moment you exceed it.
Define meaningful thresholds
A threshold isn’t a one‑size‑fits‑all number. Start by looking at your baseline from Step 1 – say your villa typically sits at 8 kW during a hot afternoon. Set the first alert a little higher, maybe 10 kW, and watch how often it fires.
If you notice the alert triggers every evening when the outdoor lights stay on, lower the threshold for that specific circuit instead of the whole house. Most platforms let you create per‑zone limits, so you can keep the living‑room lighting at 2 kW while allowing the pool pump to run up to 5 kW.
Choose the right notification channels
Push notifications to your phone are the most immediate, but you might also want an email summary each night. Some systems even integrate with your Control4 hub to flash a subtle light strip in the hallway – a silent reminder that something’s out of line.
Test each channel before you rely on it. Trigger a manual alert by temporarily increasing a load in the app; confirm the phone buzzes, the email lands, and the hub light glows. If any step fails, double‑check the integration settings or ask your installer to verify the API keys.
Automate corrective actions
The real power of real‑time alerts is that they can launch an automation without you lifting a finger. For example, create a rule that says: “If total load > 12 kW for more than 10 minutes after sunset, dim the living‑room lights to 30 % and send a push notification.”
Another handy rule for villas with solar roofs: “When solar generation exceeds 6 kW and battery state‑of‑charge is above 80 %, divert excess power to the pool pump.” This keeps you from wasting free sunshine and trims grid usage.
Monitor and refine
Give the system a week of real‑world data, then sit down on a Sunday afternoon and review the alerts log. Which alerts fired unnecessarily? Which ones never fired even though you expected them to? Tweak the thresholds, add a “quiet hours” window, or split a noisy circuit into two sensors for finer granularity.
Remember, analytics is a living process. As you add new appliances – a smart kitchen hood, an electric vehicle charger, or a home theatre – revisit the dashboard and create fresh alerts. The more precise you get, the less you’ll see surprise spikes.
In our experience, homeowners who couple real‑time analytics with automated actions see a 10‑15 % reduction in monthly energy consumption within the first three months. The savings come from catching phantom loads early and from the system’s ability to shift discretionary usage to off‑peak periods.
So, what’s the next step? Enable the live dashboard, set a few sensible thresholds, test your notification paths, and let the system start nudging you toward smarter energy habits. A few minutes of configuration today can save you hours of bill‑shock later.
Step 6: Scale for Luxury Villas, Apartments, and Commercial Spaces
So you’ve got the dashboard humming, the alerts set, and the AI already nudging you toward smarter usage. The next question most clients ask is: “Can this system handle a sprawling villa, a high‑rise apartment block, or even a boutique office?” The short answer is yes – you just need to think about scaling a little differently for each property type.
Map the new footprint before you add hardware
Start by walking the site and sketching a quick zones map. In a luxury villa you’ll likely have multiple air‑conditioning zones – a master suite, a pool area, a rooftop terrace – each with its own breaker. In an apartment building you’ll be dealing with shared services like lobby lighting, water‑pump rooms, and individual unit panels. Commercial spaces add HVAC rooftops, large‑format lighting, and maybe a data centre rack.
Write down every major load and the circuit it lives on. Don’t worry about exact numbers yet; just get the hierarchy right. That simple visual helps you decide where to place additional whole‑home monitors or sub‑panel sensors.
Choose the right monitor architecture
For a single‑family villa a single 400 A clamp‑on monitor with a handful of circuit‑level sensors usually does the trick. When you move to a multi‑unit building, split the monitoring into a “master” unit that watches the main service panel and “satellite” units on each sub‑panel. The master aggregates data so you still see a single dashboard, while the satellites give you per‑unit granularity.
In a commercial setting you may need a modular solution that can stack monitors. Think of it like adding extra bricks to a wall – each brick is a monitor that talks to the same cloud platform, so the data stays unified.
Scale the communication layer
All of the sensors need a reliable way to talk back to the hub. Zigbee and Z‑Wave work great inside a villa because the range is short and walls are thick. In larger buildings you’ll want Wi‑Fi or Ethernet back‑haul, especially for satellite monitors placed in utility rooms. A simple Ethernet switch mounted in the plant room can feed several sensors without any signal loss.
Make sure every device you add is TDRA‑certified – it guarantees the radio spectrum won’t clash with other IoT gear in a high‑density tower.
Set tiered thresholds for each zone
Now that you have the hardware laid out, it’s time to fine‑tune the alerts. A villa’s pool pump might be allowed to run up to 5 kW after sunset, but the same load in a commercial office could be a red flag if it spikes during peak hours.
Create tiered rules: a “soft” warning for a 10 % rise above the zone’s typical load, and a “hard” stop for a 25 % surge. The hub can automatically dim lights, lower set‑points, or even shut a non‑essential circuit if the hard limit is breached.
Leverage solar and storage at scale
If the property has rooftop PV, connect the inverter output to the same monitoring platform. In a villa you might divert excess solar to the pool pump. In an apartment block you can route surplus generation to a communal battery bank, then use that stored energy to power elevators during peak tariffs.
Because the AI learns the daily production curve, it can schedule high‑draw loads for when the sun is strongest, shaving off grid usage without you lifting a finger.
Test, document, and hand over
After installation, run a weekend simulation. Turn off all non‑essential loads, then re‑enable them one by one while watching the dashboard. Note any false alarms, adjust the thresholds, and make sure the hub’s automation actions fire correctly.
Document every sensor location, circuit name, and rule in a simple one‑page sheet. That sheet becomes the reference for the building manager or villa owner when they want to add a new device later.
Future‑proofing tips
Leave spare ports on your smart hub for future devices – a new EV charger, a smart water‑filtration system, or an AI‑driven air‑purifier. The platform you choose should let you add new integrations without a firmware overhaul.
Finally, schedule a quarterly review. Energy patterns shift when you change tenants, add new amenities, or when DEWA updates its tariff structure. A quick check‑in keeps the whole‑home energy monitoring system humming efficiently, no matter how big the property grows.
Conclusion
We’ve walked through everything from measuring your villa’s baseline to scaling the solution across a whole building. If you’re still wondering whether a whole home energy monitoring system is worth the effort, think about the last surprise DEWA bill you got – that shock could have been avoided.
Imagine a future where the dashboard quietly tells you which circuit is hogging power, and the hub automatically trims the load before it hits your bill. That’s not sci‑fi; it’s what we see in luxury homes across Palm Jumeirah every month.
So, what’s the next step? Grab a notebook, list your biggest loads, and schedule a quick site survey with a certified installer. A half‑day assessment will reveal the low‑hanging fruit – often phantom loads or untimed pool pumps – that you can fix instantly.
Remember, the system pays for itself when you shave just a few percent off your monthly consumption – that’s real savings in dirhams, plus a greener footprint for Dubai.
By keeping an eye on trends, you can also future‑proof your home for upcoming tariff changes or new solar incentives.
Ready to make the switch? Reach out for a personalised consultation and let us help you turn data into control, comfort, and confidence.
FAQ
What exactly is a whole home energy monitoring system?
A whole home energy monitoring system is a set of sensors, a central hub and a software dashboard that tracks every kilowatt‑hour your villa draws.
The hub talks to the sensors – usually clamp‑on meters on the main panel and optional plug‑in meters for individual circuits – and pushes live data to your phone or tablet.
In plain English, it lets you see which lights, AC units or pool pump are sipping power at any moment, so you can act before the bill spikes.
Do I need a certified installer to set it up?
Yes, especially in Dubai where the TDRA requires all IoT devices to meet local safety standards.
Smart Citizens works only with certified electricians who know how to splice a clamp‑on meter safely and program the hub to talk to your existing Control4 or similar automation platform.
A professional install usually takes a half‑day, and the installer will run a quick baseline test to confirm the numbers line up with your DEWA bills.
How much can I really save on my electricity bill?
Most villa owners we’ve helped shave 8‑15 % off their monthly consumption after the first month of monitoring.
That translates to a few hundred dirhams saved each cycle, mainly by catching phantom loads, optimizing pool‑pump runtimes and nudging AC zones to run only when needed.
Because the system flags spikes in real time, you can turn off a forgotten appliance before it adds another 50‑100 kWh.
Will the system work with my existing solar panels?
Absolutely. The hub can pull data from most grid‑tied inverters via a simple API or Modbus connection.
Once linked, the dashboard shows both import from the grid and export to the grid, letting you schedule high‑draw loads like the pool pump when solar output is highest.
This kind of load‑shifting can cut your grid usage by an extra 5‑10 % during sunny months.
Is the data secure and private?
All communication between sensors, hub and cloud is encrypted with TLS, and the platform stores data on servers that comply with UAE data‑protection regulations.
You control who can see the dashboard – typically just you, your family and the installer for troubleshooting.
There’s no public sharing of your consumption patterns, so you don’t have to worry about anyone else seeing how much you spend on cooling.
Can I expand the system later?
Yes, the architecture is modular. You can add more circuit‑level sensors, smart plugs or even an EV‑charger monitor without reinstalling the whole hub.
Just label the new device in the app, set a threshold, and the AI‑driven automation will start learning its usage patterns right away.
That flexibility means the system grows with you whether you add a new wing, a home office or a rooftop garden.
What’s the first step to get started?
Grab your last three DEWA bills, note the average kWh, and reach out for a free site survey.
During the survey a certified technician will map your main panel, recommend sensor locations and show you a quick demo of the live dashboard.
From there you’ll have a clear action plan, a budget estimate and a timeline – usually less than a week from order to live monitoring.