
Picture this: you’re standing in the foyer of a Dubai villa, the sun dipping behind the Burj Khalifa, and every light source seems to have a personality of its own. Have you ever wondered how you could make that space feel alive, yet effortless? In a city where luxury meets technology, smart lighting isn’t just a trend—it’s a lifestyle upgrade.
We’re not talking about a single bulb that glows; we’re talking about a network that learns your mood, your schedule, even the angle of the sun outside. Think about those evenings when you host a dinner party—every guest gets a lighting mood that matches their table setting, all without you flicking a switch. And when the kids finish their homework, the lights dim to a calming blue that signals it’s time to wind down.
In our experience, the biggest hurdle for villa owners in Dubai is choosing a system that feels like it was built for them, not the other way around. We’ve seen homeowners get overwhelmed by options: from simple app‑controlled fixtures to fully integrated KNX architectures that mesh with HVAC, security, and entertainment. The key is starting with a clear vision of what you want—energy savings, ambience, or perhaps a touch of theatrical flair for special occasions.
So what does that look like on the ground? First, you need a professional survey that maps every corner, every power point, and every aesthetic cue. Imagine a technician walking through your villa, taking notes on window placements, ceiling heights, and the flow of natural light. That data becomes the blueprint for a lighting plan that feels intuitive and tailored.
Next comes the tech stack. A central hub talks to bulbs, dimmers, sensors. You can hide it on a balcony railing or built‑in shelf, keeping it unseen yet in control.
TL;DR
Smart Citizens shows you how to seamlessly install Smart lighting automation, turning every corner into a personalized, energy‑saving masterpiece that feels like home. By mapping your villa’s layout, choosing the right hub, and wiring bulbs that learn your moods, you’ll enjoy effortless ambiance and cutting‑edge convenience without compromising style.
Step 1: Assess Your Villa’s Lighting Needs and Electrical Capacity
Let’s get real—before you even think about a fancy smart bulb, you need a solid map of what your villa actually needs.
Imagine walking through a sprawling Dubai villa, the sun slanting over the pool, and realizing you’ve only wired the living room. The result? A patchwork of lights that feels out of sync with the architecture. That’s why the first step is a deep‑dive assessment.
Start With a Visual Walk‑through
Grab a notepad, a flashlight, and your phone. Walk from the foyer to the kitchen, then to the bedrooms, noting each power outlet, existing light fixture, and where natural light pours in.
Ask yourself: Which areas need mood lighting? Which spaces will host guests or quiet evenings? Highlight spots that lack coverage or feel over‑lit.
Map Your Power Budget
Smart lighting can be energy‑heavy if not planned. Check your current electrical panel—how many breakers are available? What is the total load you’re already pulling? A quick audit tells you if you’re on the edge of the villa’s capacity.
In Dubai’s climate, the HVAC load is high, so you’ll want to leave headroom for smart devices without tripping breakers.
Identify Key Zones and Use‑Cases
Separate your villa into functional zones: hospitality (living room, dining), relaxation (bedroom, lounge), and practical (kitchen, bathroom). Each zone has distinct lighting demands.
For instance, the dining area benefits from dimmable pendant lights that shift from bright for meals to softer for after‑dinner chats. The kitchen needs bright, cool LEDs that aid cooking precision.
Document Everything in a Simple Sheet
Create a spreadsheet with columns: Room, Current Fixtures, Desired Lighting (ambient, task, accent), Power Outlet Count, Special Notes.
Mark rooms that already have smart potential—like those with motion sensors or existing dimmers. This quick visual will guide your hub placement.
Consider Future Expansion
Dubai villas often evolve. Think about adding a home theatre or a spa corner. Leave space in your plan for extra wiring or wireless modules. A flexible design today saves headaches tomorrow.
Use Professional Survey as a Checklist
While a DIY walk‑through is great, a certified electrician or smart‑home consultant can spot hidden issues. They’ll verify load calculations, suggest conduit routes, and ensure compliance with UAE’s TDRA standards.
They’ll also recommend the right hub—whether a centralized KNX bus or a Wi‑Fi‑based system—matching your villa’s size and your tech preference.
Real‑World Example: The Palm Jumeirah Villa
One villa on Palm Jumeirah had three separate living spaces. After a survey, the team installed a zoned KNX system that could be controlled via a single app. The client could dim the poolside lights to a serene blue while keeping the indoor dining area bright for a dinner party.
Because the electrical capacity was mapped first, the system never overloaded the breakers, even during a full‑house event.
Action Checklist
- Walk through every room and note outlet locations.
- Assess current load against panel capacity.
- Define zones and lighting intents.
- Document in a spreadsheet.
- Leave room for future additions.
- Book a professional survey if you’re unsure.
By the end of this step, you’ll have a clear picture of what the villa needs—and, more importantly, what it can handle.
Ready to move from mapping to the tech stack? Keep an eye on the next step where we’ll pick the right hub for your smart lighting dreams.
For more inspiration on lighting design in high‑ceiling villas, check out this guide on high‑ceiling villa lighting.
Step 2: Select the Right Fixtures, Color Temperatures, and Dimmers
Now that you’ve mapped out where the lights will go, the next big decision is picking the fixtures, the hues they’ll emit, and how you’ll control brightness.
Dubai villas are a playground of light‑and‑shadow, so you want fixtures that match the scale, style, and energy goals of each zone.
Start with the fixture type—LED recessed, pendant, track, or surface—and ask yourself: Does it sit flush with the ceiling, or do I want a statement piece that pops?
For high ceilings, a large recessed LED can fill the void without creating glare, while a sleek pendant over a dining table adds drama.
Choosing the Right Fixture Type
A real‑world example: The Palm Jumeirah villa we helped design chose a dimmable track system in the living room, allowing the owner to switch from a warm glow for movie nights to a cool, energizing light when hosting guests.
Now, let’s talk color temperature. LEDs come in warm‑white (2700‑3000K), neutral‑white (3500‑4100K), and cool‑white (5000‑6500K). Warm is cozy, neutral is versatile, cool is crisp.
Deciding on Color Temperature
In a villa, you’ll usually want a gradient: warm tones in bedrooms and dining areas, cooler tones in kitchens, offices, and outdoor spaces.
A handy rule of thumb: 2700K for living spaces where you want to unwind, 4000K for areas where you need to stay alert, and 5000K for the pool or garden where you want a bright, natural feel.
You might wonder: How do I know what feels right?
Try swapping sample bulbs in the same fixture to see how each hue interacts with the room’s color palette. Many installers offer sample packs; just bring them to a test morning before committing.
Integrating Dimmers and Control Logic
Moving on to dimmers, the heart of a smart lighting system. Dimmers let you fine‑tune mood, save energy, and signal different times of day.
The trick is to match the dimmer’s load capacity with the fixture’s wattage. A 2‑way dimmer for a 60W LED might be fine, but a 400W chandelier needs a heavier duty model.
Most modern dimmers now use 0–10 V or Zigbee/Z-Wave protocols for smooth transitions and integration with your hub.
When choosing a dimming protocol, think about future expansion. If you plan to add voice assistants or scene‑setting, Zigbee offers broader compatibility across brands.
A practical checklist for dimmer selection:
- Confirm fixture wattage and dimmer rating.
- Check dimming protocol (0‑10 V, Zigbee, Z‑Wave).
- Verify maximum continuous current to avoid overheating.
- Ensure compatibility with your chosen hub (e.g., Smart Citizens).
After you’ve lined up fixtures, colors, and dimmers, it’s time to draft a control matrix.
Creating a Control Matrix
This matrix maps each zone to its desired light levels and scenes—sunrise, sunset, party mode, reading.
Use a simple spreadsheet or a dedicated app to log: fixture ID, color temp, dimmer type, default lux level.
For example, the Dubai Hills villa used a table that set the living room at 300 lux with 4000K during the day, then dimmed to 150 lux and 2700K at dusk.
You’ll also want to program occupancy sensors in high‑traffic areas to automatically dim when no one’s around, saving energy and extending bulb life.
So, what’s the next step? Take your checklist, gather sample bulbs, and let the colors speak before you hit the wall.
Once the fixtures are selected and wired, the installation team will mount the dimmers behind the switches, wire the LEDs, and test each scene.
Remember, the goal is not just to have a bunch of smart lights, but to create a living, breathing environment that reacts to your day.
If you’re curious about the latest LED technology and how it can slash energy by up to 90%, you can read more about smart lighting trends in the UAE here.
Feel free to pause and reflect on how each fixture feels in your space.

Now you’re ready to bring the right fixtures, color temperatures, and dimmers to life. The next step is choosing the hub that will bring all these elements together.
Step 3: Install the Smart Hub and Connect the Wiring
Once your fixtures and dimmers are in place, the next move is to put the brain of your villa online – the smart hub. Think of it as the nerve center that lets your lights, sensors, and scenes talk to each other.
Locate the Hub Position
Pick a spot that stays out of sight but has easy access to power and a stable Wi‑Fi signal. A balcony railing or a custom‑built shelf in the living‑room walk‑in closet works great. The key is that it shouldn’t interfere with the décor but still be reachable for firmware updates.
Run the Main Power Feed
Start by pulling a dedicated circuit from the panel to the hub location. A 20 A breaker is usually enough for a typical villa hub and a few Zigbee modules. Keep the cable neat – use conduit if you’re working behind walls, and label it “Smart Hub Power.”
Wiring the Dimmer Modules
Most dimmer packs come in a 2‑in‑1 format: a 0‑10 V control line and a neutral line. Start by connecting the neutral from the main power to the dimmer’s neutral input. Then, run the 0‑10 V line from the hub’s output to the dimmer’s control terminal. Repeat this for every dimmer in your system, and double‑check that the load rating matches the fixture wattage.
Integrating Sensors and Zigbee Mesh
Attach occupancy sensors to the same Zigbee network as your hub. Position them near entrances, bedrooms, or the pool deck – wherever people move most. If you’re using a mesh‑enabled hub, you’ll see a subtle “mesh” icon on the app, indicating the network will automatically route signals through the nearest node.
Testing and Calibration
After all cables are secure, power up the hub and open the Smart Citizens app. The app will automatically detect connected dimmers and sensors. Run a quick scene test: set the living room to 75 % brightness and watch the LEDs dim smoothly. If a fixture flickers, double‑check the neutral connection and the load rating.
Fine‑Tuning for Comfort
Once the hardware is up, use the app to calibrate each dimmer’s minimum and maximum levels. That ensures you never get a dimmer stuck at the lowest setting when you want a gentle glow. Many users find setting 10 % as the lowest works well for night lights without making the room feel dark.
Document and Label Everything
Create a simple diagram in the homeowner’s manual: hub, dimmer IDs, sensor locations, and power feeds. Labeling on the panel and the back of the hub keeps future upgrades a breeze. It also helps the homeowner or a service technician troubleshoot quickly.
In our experience, the biggest mistake people make is neglecting to keep a clear wiring log. When you revisit the system years later – say you add a home theater – you’ll be grateful for the tidy documentation.
Remember, every villa in Dubai has a unique layout. If you’re working in a high‑ceiling lounge, use longer cable runs to reach the dimmer in the ceiling and consider a split‑bus to keep voltage drops minimal.
That way, you avoid flickers during peak usage.
Want to dive deeper into how Smart Citizens’ proprietary hub can streamline this process? Smart Citizens offers a detailed guide that walks through each step with screenshots and troubleshooting tips.
Step 4: Compare LED vs. OLED Smart Lighting Solutions for Luxury Villas
Let’s face it: a villa’s lighting should feel like a personal concierge, not a factory line. When you’re picking between LED and OLED, you’re really choosing how the light will behave, what it looks like, and how much energy it’ll gobble.
LED Basics: The Workhorse of Smart Villas
LEDs are the most common choice for high‑end homes. They’re bright, long‑lasting, and easy to dim to a whisper. Because most LED modules run on a 0–10 V dimming protocol, you can tie them straight into any smart hub, including the Smart Citizens platform.
Energy‑wise, a typical LED strip consumes about 10 W per meter, but the smart dimming feature can bring that down to 1–2 W during a night‑time movie. That’s a 70–80 % drop compared to a constant full‑on setting.
OLED Innovations: Softer, More Immersive Light
OLED panels use a thin film of organic material that lights up when current passes through. The result is a seamless, edge‑less glow that’s perfect for a lounge or a pool deck where you want light to blend with the sky.
Unlike LEDs, OLEDs emit light from the back, so they don’t cast harsh shadows. Their color temperature can shift from a warm amber to a crisp daylight in under a second, which is great for dynamic scenes—think sunset dinner to starlit pool parties.
Key Decision Factors
When you’re comparing LED and OLED, ask yourself:
- Do you need a very wide coverage area that’s easy to wire? LEDs win.
- Is the aesthetic a priority, especially for open‑plan spaces with no visible fixtures? OLEDs shine.
- What’s your budget? OLED panels tend to be 2–3× pricier per square foot.
- Energy savings? LEDs are more efficient overall, but OLEDs can save when you’re dimming large panels to low levels.
Actionable Steps to Pick the Right Tech
Step 1: Map the zone’s light requirements. Measure square footage and decide if you need point sources (LED) or wall‑mounted panels (OLED).
Step 2: Run a quick cost calculator. For a 200‑sq‑ft lounge, a 12‑meter LED strip costs about AED 1,200, while a comparable OLED panel might be AED 3,600.
Step 3: Test a sample. Install a small LED strip and an OLED panel in a spare corner. Switch between 50 % and 10 % brightness and note how the room feels.
Step 4: Check your hub compatibility. LEDs are plug‑and‑play with most Zigbee or Wi‑Fi hubs. OLEDs often need a proprietary controller; make sure Smart Citizens’ hub can speak to it.
Step 5: Verify power delivery. OLED panels draw steady current; if your villa’s breaker is only 16 A, you might need a dedicated circuit.
Expert Tip: Hybrid Approach
Many luxury villas use a hybrid model: LED strip lighting for ambient pool decks, OLED panels for the main lounge, and smart LED spotlights for accent walls. This gives you the best of both worlds—cost control and visual drama.
Real‑World Example: The Palm Jumeirah Residence
In one project, the owner wanted a subtle pool‑side glow that didn’t disturb guests’ eye‑level. The solution was a 4‑meter OLED panel mounted on the wall, dimming to 5 % for night use. For the indoor lounge, a 12‑meter LED strip ran along the ceiling, providing crisp, adjustable light for parties.
The smart hub synced both technologies: a single app controlled color temperature, brightness, and scene presets. The result? A cohesive lighting narrative that felt curated rather than mechanical.
Quick Comparison Table
| Feature | LED | OLED | Notes |
|---|---|---|---|
| Brightness (lumens/m²) | 120–150 | 80–100 | LEDs are brighter; OLEDs offer softer glow |
| Energy Efficiency | High (10 W/m) | Medium (15 W/m) | LEDs generally consume less power |
| Installation Flexibility | Flexible wiring, retrofits easy | Requires rigid mounting, higher upfront cost | LEDs are better for retrofit; OLEDs for new builds |
Takeaway? The decision hinges on what feels most natural for your space and what your budget allows. Test both, talk to a certified installer, and let the light tell you which one fits best.
Step 5: Integrate AI‑Powered Voice Control and Automation
Now that the bulbs, dimmers, and sensors are humming, it’s time to give your villa a brain. AI‑powered voice control lets you whisper a mood into the air and watch the lights dance. It’s the final flourish that turns a smart house into a living, breathing companion.
Why Voice Control Matters
Picture this: you’re hosting a dinner party, the sunset is bleeding orange, and you say, “Set the living room to sunset.” The lights dim to a warm amber, the music softens, and guests feel instantly at ease. That’s the power of voice. It removes the barrier between intent and action, making the system feel like a trusted side‑kick.
Choose the Right Voice Assistant
Dubai’s market is a mix of Amazon Echo, Google Nest, and Apple HomePod. Pick one that aligns with the rest of your ecosystem. If your hub already speaks Zigbee, Echo or Nest are natural fits. Apple HomeKit works best if you have a lot of iOS devices.
- Echo: Best for broad third‑party skills and robust Alexa routines.
- Nest: Great for Google‑centric homes and seamless integration with Google Assistant.
- HomePod: Ideal if you value privacy and high‑fidelity audio.
In our experience, many villa owners in Dubai lean toward Echo because it easily talks to Zigbee dimmers and motion sensors.
Set Up the Hub for Voice Connectivity
Step 1: Plug the smart hub into a dedicated outlet near the main distribution board. Make sure it has a stable Wi‑Fi connection. Step 2: In the hub’s app, enable the voice assistant integration. This usually means logging into your Amazon, Google, or Apple account and authorizing the hub.
Step 3: Map each lighting zone to a distinct “room” in the assistant’s interface. For example, the pool deck becomes “Pool Deck,” the master bedroom becomes “Master,” and so on. This naming clarity is essential for clean voice commands.
Create Intuitive Voice Commands
Use simple, conversational phrases. Instead of “Activate Scene 3,” say “Set the lounge to movie night.” The assistant will remember these phrases as shortcuts. Here’s a quick cheat sheet:
- “Lights on” or “Lights off” – toggles all lights.
- “Set living room to cozy” – dims to 30% and shifts to 2700K.
- “Party mode” – brightens living room to 100% and switches to a dynamic color swirl.
- “Good night” – dims bedroom lights to 10% and turns off all other zones.
When you’re setting commands, think like a guest. “Good evening” should bring a soft, welcoming glow, not a hard spotlight. This small empathy builds trust.
Add AI‑Driven Scene Logic
AI can go beyond static scenes. Use occupancy sensors to trigger “Arrival” or “Departure” scenes automatically. For instance, when the motion sensor in the hallway detects movement, the system can say, “Welcome home!” and light up the foyer at 70%.
Another smart trick: let the system learn your habits. If you usually dim the dining area at 6 pm, the hub can start that pattern on its own. It’s like having a personal lighting concierge who never forgets your preferences.
Testing & Refinement
Don’t just set up and walk away. Test each command in real time. Ask your voice assistant to “set the pool deck to sunset.” Watch the lights and note any lag or mis‑interpretation. If something feels off, tweak the routine or adjust the sensor placement.
Document your final routine list. A simple spreadsheet with command, zone, brightness, color temp, and notes saves headaches if you need to revisit the system later.
Finally, keep the hub firmware up to date. Manufacturers often add new voice skill libraries that can expand your command repertoire.
Integrating AI voice control transforms a villa from a collection of gadgets to a responsive, intuitive home. The moment you can say, “Lights, please,” and have the whole space respond, you’ll realize you’ve crossed the threshold from smart to truly smart. Let your villa listen, learn, and light in harmony with your lifestyle.
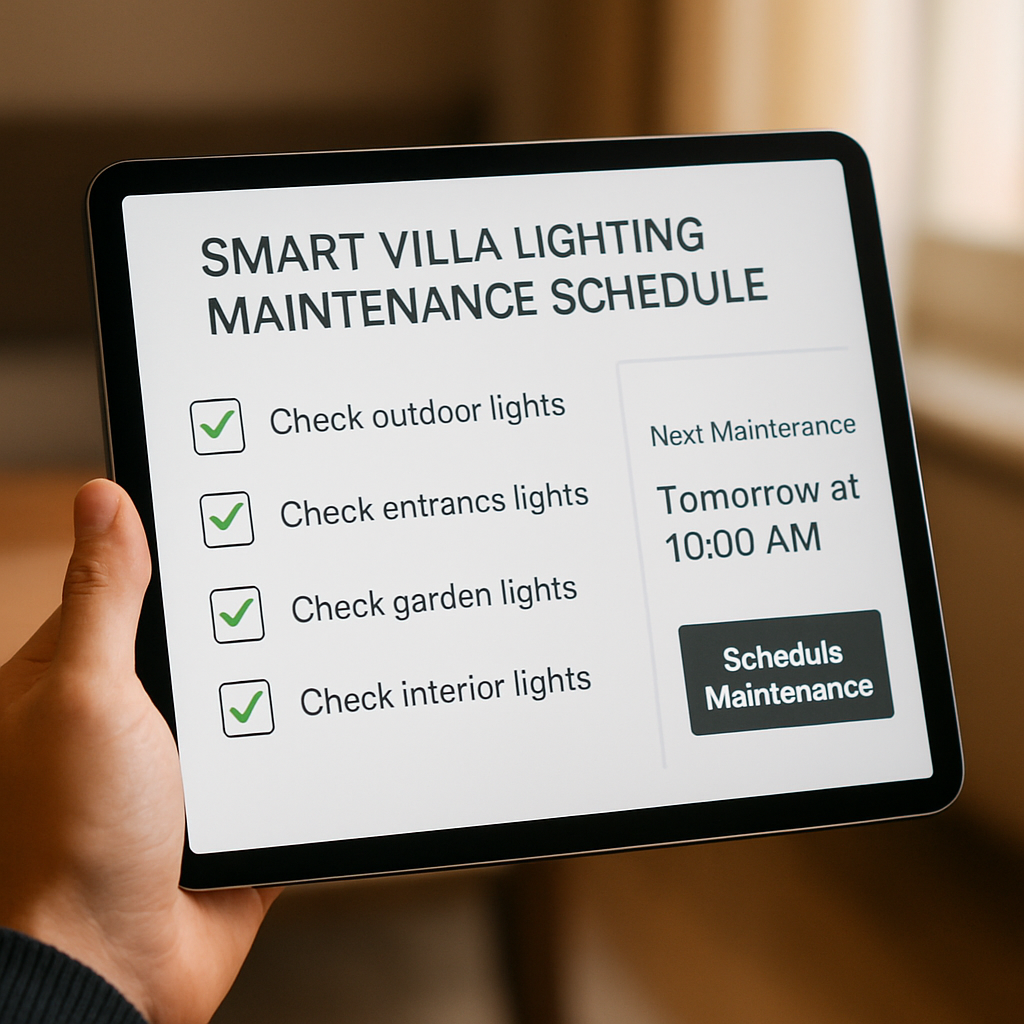
Step 6: Schedule Routine Maintenance and Monitor Energy Savings
We’re almost at the finish line. Your villa’s lights are now smart, but smart systems need love, just like a good espresso machine.
Set a Simple Maintenance Calendar
Think of it as a yearly check‑in with your lighting. Pick a date in late spring, when the bulbs are fresh and the weather is mild. Mark it on your digital planner and set a reminder. Every quarter, do a quick walk‑through: look for flickering fixtures, dust‑build‑up on diffusers, or any dimmer that feels stuck.
Write the tasks down: clean lenses, test dimmer ranges, verify sensor triggers. A spreadsheet works wonders—columns for room, fixture, last‑checked, notes. It gives you a snapshot in seconds.
Why Regular Checks Matter
Smart bulbs are usually rated for 25,000 hours, but that’s under ideal conditions.
When a bulb is compromised, it draws more current, which bumps up your bill.
That’s why a yearly review can save you a few hundred dirhams—easy math for a villa that already spends on premium services.
Besides cost, it’s about safety. A loose fixture can spark or, in extreme cases, start a fire.
Track Energy Consumption in Real Time
Most hubs let you pull energy reports. Log into your dashboard, pick the “Energy” tab, and you’ll see watts per zone.
Compare the numbers each month and watch for spikes.
Set an alert: if the living room lights jump above 150 W for more than 30 minutes, the system will ping you.
That way you catch a faulty dimmer or an unauthorized extra lamp before it turns into a bill bump.
Want to get fancy? Plug a simple IoT energy monitor into the circuit, and let the hub report kilowatt‑hours directly.
It’s an extra layer of confidence that the lights are behaving.
Quick Fixes When Things Go South
1. Loose Connections: If a bulb flickers, unplug it, check the socket, and reseat it. A solid fit cuts down resistance and heat.
2. Clean the Lens: Dust can dim LEDs dramatically. Use a microfiber cloth and a mild cleaner; the result feels instant.
3. Reset the Hub: If a sensor stops responding, try a quick reboot. A fresh handshake often solves the glitch.
4. Re‑map a Scene: Over time, your living patterns change. If a “movie night” scene is too bright, lower the baseline. Adjusting the preset keeps the mood right without extra bulbs.
Every time you tweak something, jot it down in the spreadsheet. That log turns into a troubleshooting guide for the next homeowner or tech support.
And here’s a quick tip: schedule a 30‑minute review right after the holidays. Light usage spikes, and a quick check can catch any new quirks early.
Finally, let your maintenance routine become part of your villa’s lifestyle. When the lights stay reliable and energy stays low, you’ll notice the difference in comfort and cost—exactly what you wanted from a smart system.
Ready to set that calendar? Let’s make maintenance feel like a breeze, not a chore.
FAQ
1. What’s the first thing I should do before buying smart bulbs for my Dubai villa?
Start with a quick audit of every power point and fixture. Walk through each zone, note the ceiling height, natural light entry and how many outlets you have. This map tells you whether you need a single hub, a mesh of Zigbee nodes, or a wired KNX backbone. Without that baseline you’ll end up wiring a half‑finished system that trips breakers at the wrong time.
2. How can I choose the right hub for a high‑end villa in Dubai?
Think about scale and future expansion. A central KNX bus works great for a 6‑room villa because it’s wired and never loses a signal, even when you add a pool deck or a home theatre. If you prefer Wi‑Fi, look for a hub that supports Zigbee‑to‑Wi‑Fi bridges so that motion sensors can hop from the hallway to the pool side without lag.
3. What fixtures are best for a luxury villa with high ceilings?
For soaring ceilings a recessed LED with a wide beam spreads light evenly without glare. If you want drama, a dimmable pendant or track system gives you a statement piece that still plays nice with the rest of the lighting. Just remember the dimmer rating—match it to the fixture’s wattage so you never hit a “too‑bright” warning.
4. How do I set up the dimming protocol without tripping the breaker?
Use a 0‑10 V controller for a smooth, analog dimmer or a Zigbee dimmer that negotiates load with your hub. Before wiring, calculate the total load: sum all bulb wattage, add a 20% safety margin, and compare that figure to your panel’s available breaker capacity. A quick spreadsheet keeps you from oversizing a circuit that feels like a ticking time‑bomb.
5. Can I add voice control after the lights are installed?
Absolutely. Once the hub is online, link it to an Amazon Echo or Google Nest by simply enabling the integration in the hub’s app. Map each zone to a room name—Pool Deck, Master Bedroom, Kitchen—so you can say “Set the pool deck to sunset” and the lights react instantly. No rewiring is needed, just a few routine updates.
6. What’s the easiest way to keep my smart lighting running smoothly year‑round?
Create a quarterly maintenance calendar. Inspect for dust on lenses, test each dimmer’s minimum setting, and verify that every sensor fires as expected. Log any changes in a spreadsheet; that log becomes a troubleshooting guide for future upgrades. When a bulb flickers, check the socket first—often a loose connection is the culprit, not the light itself.
7. How can I monitor energy savings without a fancy dashboard?
Most hubs let you export a simple CSV of watts per zone. Open it in a spreadsheet and plot monthly usage. Look for spikes that match your villa’s high‑energy moments—like a summer pool party or a holiday gathering. If the living room lights stay above 150 W for more than 30 minutes, tweak the scene or replace a bulb to keep the bill in check.
Conclusion
You’ve walked through every wiring knot, every dimmer setting, and every voice command. By now you’re ready to step out of the blueprint and into a living, breathing environment that feels like it knows you.
The magic lies in the details: a clean wiring log, a calibrated dimming curve, and a voice routine that matches your daily rhythm.
In our experience, a well‑documented system keeps future upgrades painless. When a new fixture arrives, you’ll just add a row to the spreadsheet and flash the hub.
Energy insight is another win. Exporting a simple CSV and spotting a 30‑minute spike tells you where to tweak without hunting for a culprit.
If the lights ever feel off, the first line of defense is the socket. A loose fit can make a bulb look like a flame.
Remember, a smart villa is a partnership between people and technology. Your curiosity and your hub’s data are the two hands that build comfort.
So, what’s the next step? Reach out for a free on‑site survey and let an expert map out the final touchpoints that make the system sing.
And when you do, keep the calendar handy. A quarterly glance keeps flickers at bay and keeps the bill in line.
You’ve got the tools, the plan, and the confidence. Now it’s time to let those lights tell the story of your home.