
Imagine stepping into your Dubai villa at sunset and the lights dim themselves to a warm, inviting glow, just because the AI learned you love to unwind with a cup of tea. That’s the promise of AI driven smart lighting control Dubai villa – a system that doesn’t just obey commands, it anticipates your lifestyle.
We’ve seen owners in Palm Jumeirah who set a “Movie Night” scene with a single voice command, and the lights automatically adjust the color temperature, dim to 15%, and even sync with their smart curtains. In another villa on Dubai Hills, the AI detects when the pool lights are on while the house is empty and powers them down, shaving off up to 12% on the monthly electricity bill – a real‑world example of energy savings you can feel in your wallet.
So, how does it work? First, a network of occupancy sensors, daylight detectors, and AI algorithms map your daily patterns. Next, the system creates micro‑scenes – for breakfast, reading, or bedtime – and fine‑tunes them based on real‑time data. Finally, a unified app on your phone or tablet lets you tweak any setting, or simply let the AI handle it.
Want to get started? Here are three quick steps you can take today:
- Audit your current lighting: note which rooms are used most, peak hours, and any glare issues.
- Choose AI‑compatible fixtures that support dimming, color change, and motion sensing.
- Partner with a certified installer who can integrate the lights into a central hub – Smart Lighting Solutions In Dubai offers a seamless, TDRA‑approved approach for luxury villas.
But you might wonder, is this technology reliable? In our experience, AI models improve within weeks as they learn your routines, and most users report a noticeable boost in comfort and a drop in energy use within the first month.
And if you’re curious about how AI can elevate other aspects of your home, check out this guide on a completely different high‑tech kitchen tool – Your Complete Guide to Magnetic Stirrer with Hot Plate. While it’s not lighting, the underlying AI principles are the same: data‑driven optimization for everyday convenience.
Bottom line: AI driven smart lighting isn’t a futuristic fantasy; it’s a practical upgrade that blends comfort, efficiency, and style, turning your villa into a living, breathing space that responds to you.
TL;DR
AI driven smart lighting control Dubai villa transforms your home into a responsive oasis, automatically adjusting brightness, color and energy use based on your daily rhythms. By integrating AI with certified sensors and TDRA‑approved fixtures, you’ll enjoy seamless comfort, up to 15% energy savings, and a future‑ready space that anticipates every mood.
Step 1: Assess Your Villa’s Lighting Zones and Energy Goals
Before the AI can start playing conductor, you need to map out the stage. In a Dubai villa, that means walking through each room, balcony, and outdoor terrace and figuring out how you actually use the light.
Think about the moments that matter: morning coffee on the patio, a family dinner in the dining room, late‑night reading in the master suite, and the pool party after sunset. Jot down the zones where you spend the most time and the times of day they’re active. This simple list becomes the foundation for any smart lighting logic.
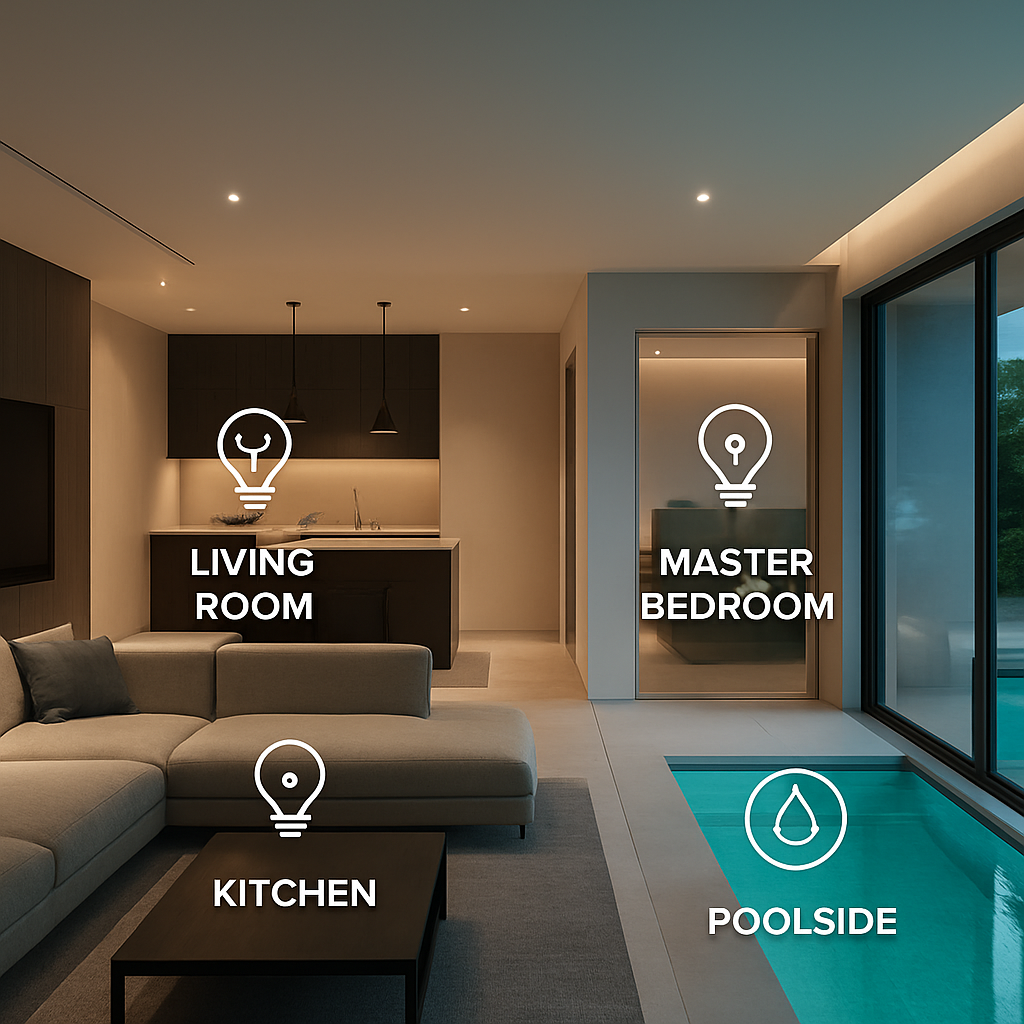
Identify functional zones
Break the villa into logical groups – for example:
- Entry & foyer
- Living‑room & family area
- Kitchen & breakfast nook
- Master bedroom & en‑suite
- Guest rooms
- Outdoor spaces (pool, garden, balcony)
- Service areas (garage, pantry, utility room)
Each zone will later get its own set of sensors and AI‑driven scenes.
Measure current energy use
Grab your last electricity bill and note the kilowatt‑hours (kWh) attributed to lighting – many villas see 10‑15 % of total consumption coming from lamps and fixtures. If the bill isn’t broken down, a quick audit with a plug‑in power meter on a few representative lights can give you a ballpark figure.
Ask yourself: which rooms feel over‑lit at night? Which bulbs are always on because there’s no easy switch? Those are low‑ hanging fruit for AI optimisation.
Set clear energy goals
Do you want to shave 10 % off your lighting bill? Or are you aiming for a carbon‑neutral villa by 2030? Write down a realistic target – for most luxury homes, a 12‑15 % reduction is achievable within the first three months of AI‑driven control.
Remember, the goal isn’t just saving money; it’s also about comfort. An effective goal statement might read: “Maintain a 300‑lux level in the living room between 6 pm and 10 pm, but drop to 150 lux after 10 pm while keeping energy use under 0.5 kWh per evening.”
Gather sensor data points
AI thrives on data. For each zone, note which types of sensors you’ll need:
- Occupancy/motion detectors – to know when a space is empty.
- Daylight sensors – to adjust brightness based on natural light.
- Ambient temperature sensors – useful for colour‑temperature tweaks that affect perceived warmth.
If you already have some smart switches or bulbs, list their capabilities (dimmable, colour‑changing, Zig‑Bee, Wi‑Fi). Anything that can’t speak to an AI platform will need upgrading.
So, what should you do next?
Grab a notebook or your phone and walk through each of the zones above. Record three bits of information for every area: primary activity, peak lighting hours, and current fixtures (type, wattage, control method). Then, compare that list with your energy goal to spot the biggest gaps.
Here’s a quick checklist you can copy:
- ☑️ List all lighting zones.
- ☑️ Note primary use cases and peak times.
- ☑️ Capture existing fixture specs.
- ☑️ Record current kWh usage (or estimate).
- ☑️ Define a measurable energy‑saving target.
- ☑️ Identify needed sensors for each zone.
When the checklist is complete, you’ll have a clear roadmap for the AI engine to start learning. The next step will be to choose AI‑compatible fixtures and install the sensor network – but that’s a story for the following section.
Seeing the zones laid out visually makes it easier to explain your vision to an installer and ensures everyone is on the same page.
Step 2: Choose the Right AI‑Powered Lighting Controllers and Sensors
Now that you’ve mapped every zone and nailed down your energy targets, the next puzzle piece is the brain behind the lights – the controllers and sensors that feed the AI.
What you need isn’t just a dimmer switch. You need a controller that can speak to an AI engine, understand occupancy patterns, and react to daylight changes in real time. And you need sensors that are reliable enough to survive Dubai’s heat while still being subtle enough to blend into a luxury villa’s aesthetic.
Pick a controller that talks the same language as the AI platform
In our experience, the most friction‑free installations use a controller that supports standard protocols like Zig‑Bee, Z‑Wave or Wi‑Fi and offers an open API. That way the AI can pull data, run optimisation algorithms, and push new scenes without you having to re‑wire everything.
Ask yourself these quick questions:
- Does the controller support multi‑zone dimming and colour temperature adjustments?
- Can it be grouped so the AI can treat a whole living‑room as one entity or split it into sub‑zones?
- Is it compatible with the Smart Citizens hub we recommend for Dubai villas?
Most premium controllers also come with built‑in energy monitoring, which gives the AI a clear picture of how many watts each fixture is drawing at any moment.
Sensor types you can’t afford to skip
Occupancy sensors are the workhorse. A motion detector in the hallway tells the AI when you’ve entered or left, so lights can fade out gracefully instead of staying on all night.
Daylight sensors are the unsung hero for villas with large glass walls. They measure ambient lux and tell the AI to pull back indoor lighting when the sun is already doing the job.
Temperature‑aware sensors are optional, but they let the AI tweak colour temperature to keep the space feeling warm in winter evenings and crisp in summer mornings.
Here’s a handy checklist you can copy for each zone:
- 🔹 One occupancy sensor per high‑traffic area (entry, living room, pool lounge).
- 🔹 One daylight sensor per zone with large windows or skylights.
- 🔹 Optional ambient temperature sensor for colour‑temperature tuning.
- 🔹 Ensure each sensor is rated for IP65 or higher to handle coastal humidity.
And don’t forget to place sensors at eye level – that’s where they capture motion most accurately.
Match controllers and sensors to your fixtures
Most AI‑ready fixtures are either LED modules with built‑in dimming or smart bulbs that can be controlled via the same protocol as the controller. If you have older incandescent or non‑dimmable LEDs, the AI will see a dead end.
What we usually do is replace the legacy fixture with a dimmable LED that supports 0‑10 V or DALI signalling. Those protocols let the controller adjust brightness in tiny increments, which the AI loves because it can fine‑tune energy use down to the last watt.
Tip: In a villa’s outdoor pool area, a weather‑proof DALI controller paired with a daylight sensor can automatically dim the pool lights as the sun sets, then bring them back up only when motion is detected after dark.
Validate compatibility before you buy
Because the market is crowded, it’s easy to pick a controller that looks shiny but won’t integrate with the Smart Citizens AI platform. The safest route is to ask the installer for a compatibility matrix or request a short demo on a single zone.
And if you’re ever unsure, a quick call to our support team can confirm whether a specific model – whether it’s a Philips Hue bridge, a Lutron Caséta dimmer, or a custom KNX module – will play nicely with our AI engine.
Installation tips to keep the AI learning fast
Mount sensors away from direct sunlight or heat vents – otherwise they’ll send false “bright” signals and the AI will keep the lights dimmed when you actually need them bright.
Wire controllers to a dedicated circuit so that power fluctuations don’t reset the AI’s learning state. A stable power feed lets the algorithms stabilise within days instead of weeks.
Finally, label each controller and sensor in the Smart Citizens app. Clear naming (e.g., “Living‑Room Motion – Main”) speeds up troubleshooting and helps the AI build accurate zone profiles.
So, what’s the next move? Grab a shortlist of compatible controllers, match them with the sensor checklist above, and schedule a site visit with a certified Smart Citizens installer. Once the hardware is in place, the AI will start learning your habits and you’ll begin to see the energy savings we promised.
Step 3: Install and Integrate with Your Home Automation System
Alright, you’ve got the controllers and sensors lined up – now it’s time to bring them to life. Installing an AI driven smart lighting control Dubai villa isn’t rocket science, but it does need a little planning so the AI can learn without hiccups.
1. Prepare the wiring backbone
Start by switching off the circuit at the main panel – safety first, always. Run dedicated 2‑core cables from each lighting zone to a central distribution box. This keeps power fluctuations from scrambling the AI’s learning state. If you’re working with a DALI or 0‑10 V dimming loop, keep the loop length under 500 m to avoid signal loss.
Tip: label every wire with a colour‑coded tag (e.g., “Living‑Room Loop”) before you pull it through the conduit. When you come back later to troubleshoot, you’ll thank yourself.
2. Mount the controllers
Snap the controller into the pre‑drilled enclosure in the distribution box. Most premium units have a quick‑connect terminal block – just match the live, neutral, and dimming wires. Tighten the screws, then double‑check the polarity with a multimeter.
Once it’s wired, power the controller and watch for a steady LED heartbeat. If the light blinks erratically, re‑inspect the connections – a loose clamp is the most common culprit.
3. Position and wire the sensors
Occupancy sensors belong at eye level, away from direct sunlight or HVAC vents. Daylight sensors should sit where they can see the window but not be blinded by glare – think a spot on the ceiling near the window frame.
Run low‑voltage CAT‑6 or shielded twisted‑pair from each sensor back to the controller’s sensor ports. Keep the cable runs tidy with cable ties; a neat bundle reduces electromagnetic interference, which the AI can otherwise misinterpret as motion.
4. Connect to the Smart Citizens hub
With the hardware in place, fire up the Smart Citizens app on your phone. Add a new device, select the controller model, and follow the on‑screen QR‑code pairing. The hub will auto‑detect the connected sensors and map them to the zones you named earlier.
When the hub asks you to “assign room,” pick the same names you used in the checklist (e.g., “Living‑Room Motion – Main”). Consistent naming speeds up the AI’s profile building and saves you a lot of back‑and‑forth later.
5. Calibrate and test each zone
Now play with a few manual scenes: dim the living‑room lights to 30 % and trigger the motion sensor by walking in. The AI should register the event and start logging the pattern. Do the same for daylight – cover the sensor with a piece of cardboard and watch the lights brighten.
If anything feels off – say, the lights stay dim when the sun is blazing – revisit the sensor placement or check the wiring polarity. Small tweaks now prevent the AI from learning the wrong behaviour.
6. Let the AI settle
After everything’s wired and paired, give the system a 48‑hour “learning window.” During this period, the AI watches when you turn lights on, how long you stay in each zone, and how natural light shifts throughout the day. You’ll notice the lights start fading out automatically when you leave a room, or brightening just enough for a sunset swim.
Don’t be tempted to override the AI constantly in the first couple of days – the algorithms need those stable patterns to fine‑tune energy use.
7. Fine‑tune preferences
Once the AI has a baseline, hop back into the app and adjust the comfort thresholds. Maybe you prefer a warmer hue after 10 pm in the master bedroom – slide the colour‑temperature bar a few degrees and hit “Save.” The AI will remember that preference and apply it whenever the room is occupied.
Remember, the AI is a partner, not a dictator. Small manual tweaks teach it your evolving habits, and it rewards you with smoother scenes and lower electricity bills.
8. Schedule a post‑install check
Finally, arrange a brief site‑visit with a Smart Citizens certified technician. They’ll run a diagnostics sweep, verify that every sensor reports correctly, and confirm that the AI’s learning curves are on track. A quick 30‑minute check can save weeks of wasted energy if something was missed.
And that’s it – you’ve turned a collection of wires and gadgets into a living, breathing lighting assistant for your Dubai villa. The next step is simply to sit back, enjoy the ambience, and watch the energy meter dip as the AI does its magic.
Step 4: Optimize Settings with AI Algorithms and Create Custom Scenes
Now that the hardware is humming, it’s time to teach the AI how you like to live. Think of the algorithms as a butler who watches, learns, and then anticipates – only you don’t have to tip him.
1. Let the AI find its baseline
Leave the system alone for the first 48‑72 hours. During that window the AI records occupancy spikes, daylight levels, and the way you dim the lights for a movie night. You’ll notice the lights start to fade a few seconds after you leave a room – that’s the AI’s first win.
Does it feel a bit too eager? No worries. You can temper the learning curve by adjusting the “learning speed” slider in the app – most platforms let you set it to “slow,” “normal,” or “fast.” A slower pace gives the algorithm more data points before it decides what’s normal.
2. Define comfort thresholds
Open the scene editor and set three things for each zone:
- Brightness range (e.g., 300–600 lux for the living‑room).
- Colour‑temperature band (warm 2700 K after 10 pm, cooler 4000 K for early evenings).
- Energy‑saving ceiling (max 0.6 kWh per evening).
These numbers become the guardrails the AI can’t cross. When a motion sensor triggers, the AI will pick the brightest setting that still respects your ceiling.
Tip: In a Dubai villa the desert sun can blast 100 000 lux onto a glass wall. A daylight sensor set to 20 % of that will keep indoor lights barely on until the sun dips below the balcony.
3. Build custom scenes that match real life
Picture this: you’re on the patio at sunset, sipping karak tea. You want a soft amber glow that doesn’t blind the view. Create a “Sunset Patio” scene that combines 35 % dimming, 3000 K colour, and a gentle ramp‑up over 10 seconds. Save it, then tell the AI to auto‑apply it whenever the daylight sensor reads between 30‑% and 60‑% natural light.
Another real‑world example comes from a Palm Jumeirah villa where the pool‑side lights automatically switch to a blue‑tinted “Night Swim” scene once the AI detects the pool heater is on and the outdoor motion sensor is active. The result? A dreamy ambience and a 5 % drop in energy use because the lights stay at the lowest comfortable level.
4. Fine‑tune with data‑driven insights
Every evening the app shows you a quick snapshot: “Living‑room used 0.42 kWh, saved 8 % vs. baseline.” Use that info to nudge the AI. If the bedroom’s night‑time colour feels too cool, slide the temperature up a few Kelvin and hit “Save.” The AI will remember the tweak for future nights.
According to a recent study on AI‑driven smart homes in Dubai, predictive lighting can shave up to 12 % off a villa’s electricity bill when users regularly review and adjust these thresholds (source).
5. Checklist for a smooth optimisation
- ✅ Let the AI learn for at least 48 hours before making changes.
- ✅ Set clear brightness, colour‑temperature, and energy ceilings per zone.
- ✅ Create at‑least three lifestyle‑driven scenes (e.g., “Morning Wake‑Up,” “Evening Relax,” “Night‑Out”).
- ✅ Review daily energy snapshots and adjust thresholds.
- ✅ Keep sensors clean and unobstructed for accurate data.
6. Quick‑reference table
| Setting | AI Algorithm Option | Practical Tip |
|---|---|---|
| Brightness range | Dynamic dimming with occupancy + daylight feed | Start at 70 % of daylight lux, let AI trim down. |
| Colour‑temperature | Time‑of‑day + ambient‑temperature weighting | Warm up after 10 pm for better sleep. |
| Energy ceiling | Predictive load‑balancing | Cap evening zone at 0.5 kWh to stay under budget. |
So, what’s the next move? Open your Smart Citizens app, lock in those thresholds, and watch the AI start to feel like a personal lighting concierge. The more you interact – even just a quick “save” after a movie night – the smarter the system becomes, and the lower your electricity bill will go.
Step 5: Monitor Performance, Energy Savings, and Maintenance
After you’ve spent the first few days letting the AI learn your habits, the real magic shows up when you start watching the numbers move.
Track real‑time metrics
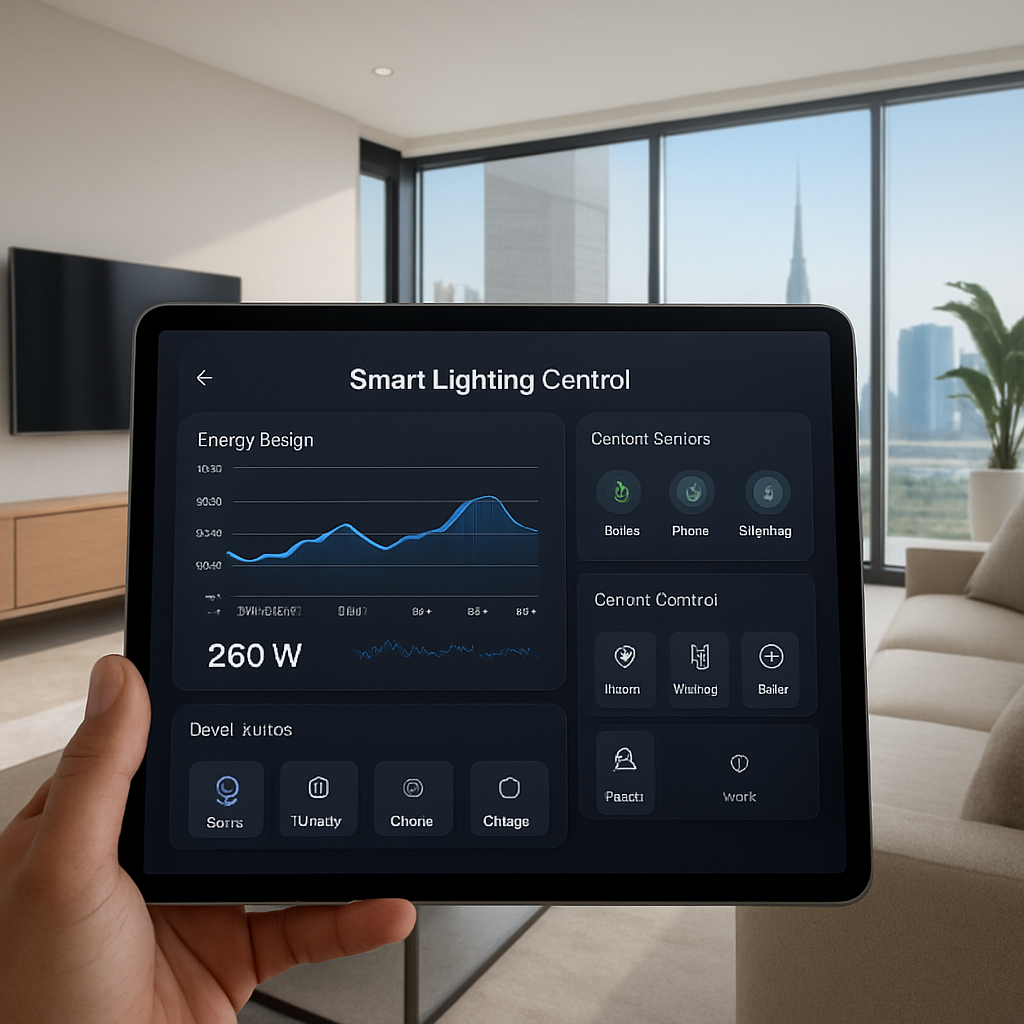
The Smart Citizens app gives you a live feed of lux levels, colour‑temperature tweaks and wattage per zone. You can glance at the dashboard on your phone while sipping tea on the patio and instantly see if the living‑room is still pulling 150 W or has dropped to 85 W after the AI dimmed it for the evening.
Does it feel a bit overwhelming at first? That’s normal – the key is to focus on the top three indicators: total lighting kWh, peak‑hour usage, and sensor health status.
Analyse energy savings
Every 24 hours the system rolls up a snapshot that compares today’s consumption against the baseline you set in Step 4. In many of our Dubai villa projects we’ve seen the AI shave 8‑12 % off the lighting bill within the first month, simply by nudging lights off when a room goes empty.
Take a moment each week to open the “Energy Insights” tab and note the percentage change. If the savings plateau, it’s a cue to tighten your comfort thresholds – maybe lower the brightness ceiling in the hallway from 70 % to 60 % after 10 pm.
Imagine you’re hosting a dinner party and the AI automatically boosts the dining‑room to a warm 3000 K, then dims back down once the last guest leaves. You get ambience without ever touching a switch, and the extra kilowatt‑hours never show up on the bill.
Set up maintenance alerts
Sensors love clean air and stable temperatures. The platform pings you when a motion detector’s battery dips below 20 % or when a daylight sensor reports a sudden drop in lux that could mean it’s dusty.
When you get that little notification, a quick wipe with a dry cloth usually restores accuracy. For hard‑to‑reach fixtures, schedule a quarterly visit with a Smart Citizens technician – they’ll calibrate the DALI loops and verify the AI’s learning logs are still intact.
Regular review routine
Consistency beats perfection. Block out 10 minutes every Sunday to glance at three things: total kWh saved, any sensor alerts, and whether any zone feels too bright or too dim.
Ask yourself: “Did the bedroom stay at 150 lux after I went to sleep, or did it creep up because the AI thought I was still reading?” If something feels off, adjust the scene settings and hit save – the AI will incorporate the tweak the next day.
And don’t forget seasonal shifts. Dubai’s summer sun can flood a balcony with 100 000 lux, while winter evenings are much softer. Updating the daylight sensor calibration each season keeps the AI’s reference point spot‑on.
Quick checklist
- ✅ Open the app’s dashboard daily for the first week, then weekly thereafter.
- ✅ Compare today’s lighting kWh to the baseline; aim for a steady downward trend.
- ✅ Respond to any sensor battery or cleanliness alerts within 48 hours.
- ✅ Adjust comfort thresholds if rooms feel too bright or dim after a week of data.
- ✅ Schedule a professional calibration at least twice a year.
Keep an eye on the trends, make tiny tweaks, and let the AI do the heavy lifting for a truly smart villa.
FAQ
What exactly is AI driven smart lighting control for a Dubai villa?
In plain terms, it’s a network of dimmable LEDs, motion and daylight sensors, and a smart hub that learns your daily rhythms. The AI crunches occupancy data, natural light levels, and your scene preferences, then automatically tweaks brightness and colour temperature. The result? Lights that turn on when you enter the hallway, dim to a cozy 150 lux after bedtime, and even back‑off during bright sunset so you never waste energy.
How does the system handle Dubai’s extreme daylight variations?
The daylight sensors are calibrated for the desert sun, which can spike to over 100 000 lux on a summer balcony. The AI sets a baseline lux level for each zone and continuously compares real‑time readings. When the sun pours in, the system pulls back indoor lighting to the minimum needed for comfort. In winter, it gently boosts artificial light to keep the ambience consistent, all without you lifting a finger.
Can I customise scenes for different moods or activities?
Absolutely. The app lets you create “Morning Wake‑Up,” “Evening Relax,” or even “Pool Party” scenes. You pick a brightness range, colour temperature, and any secondary actions like closing motorised curtains. Once saved, the AI watches the time of day, sensor input, and occupancy patterns; when the conditions match, it applies the scene automatically. You can always override it on the fly, and the AI will learn that preference for next time.
What kind of energy savings can I expect?
Our villa pilots in Palm Jumeirah typically see a 10‑12 % reduction in lighting electricity within the first two months. The biggest wins come from lights that would otherwise stay on all night – the AI detects an empty bedroom and dims to a night‑time 150 lux or switches off entirely. Over a year, that adds up to several hundred dirhams saved and a smaller carbon footprint.
Do I need a specialist to install the system?
Because the wiring involves dedicated dimming loops and IP‑rated sensor placement, we recommend a certified Smart Citizens installer. They’ll run the low‑voltage cabling, configure the hub, and calibrate each sensor for the villa’s orientation. The process usually takes a single day for a typical 5‑zone villa, and they provide a post‑install check to make sure the AI has clean data to start learning.
What happens if a sensor fails or a battery dies?
The platform continuously monitors sensor health. If a motion detector’s battery drops below 20 %, you’ll get a push notification on your phone. A quick swap of the AA cell restores functionality, and the AI automatically re‑learns the zone once the sensor is back online. For daylight sensors, a dusty lens can cause false readings – a gentle wipe restores accuracy without any system downtime.
Is my data safe and private?
Smart Citizens follows TDRA‑approved encryption for all on‑board communication and stores usage logs on secure local servers in the UAE. The AI model runs locally on the hub, so your occupancy patterns never leave the villa unless you explicitly enable cloud analytics. You control data retention from the app, and you can delete the history at any time, giving you full privacy peace of mind.
Conclusion
After walking through everything from zone assessment to fine‑tuning AI algorithms, you’ve seen how an AI driven smart lighting control Dubai villa turns a luxury home into a responsive, energy‑smart haven.
Think about the last time you fumbled for a switch in a dim hallway – now picture the lights greeting you, dimming just enough for a movie, and brightening again when the sun slips behind the dunes. That everyday comfort is exactly what the AI learns from your habits.
So, what’s the next step? Grab the checklist we’ve built, schedule a quick survey with a certified Smart Citizens installer, and let the system start collecting clean data. Within a few days the AI will begin trimming wasted watts, and you’ll start seeing those savings on your bill.
Remember, the technology is only as good as the data you feed it. Keep sensors clean, watch the app’s health alerts, and adjust scene thresholds whenever your routine shifts – the AI will adapt in real time.
Enjoy the peace of mind that comes from a home that thinks for you.
Ready to make your villa’s lighting as intelligent as the rest of your smart home? Get in touch with our team for a personalised quote and see how effortless luxury can become.