Ever wonder how a handful of smart devices can turn your Dubai villa into a living, breathing assistant? It’s not just about gadgets— it’s about the peace of mind that comes from knowing every light, temperature, and security sensor is humming in harmony.
Picture this: you’re back from a long day, the air conditioning should be set to 22°C, but you’re still sweating because the system lagged during the heatwave. That’s a common headache for homeowners who rely on legacy setups. In our experience, a single misconfigured thermostat can cost you hundreds a year in unnecessary cooling.
That’s why we’ve distilled the most effective strategies into a simple, step‑by‑step playbook that even a non‑techie can follow. First, map your daily routines—when you’re at home, away, or sleeping—and match each pattern to a temperature profile. Next, choose a thermostat that supports Wi‑Fi and remote overrides; a quick glance at our Smart Thermostat Installation Guide for Dubai Homes and Offices will show you the best options for the local climate.
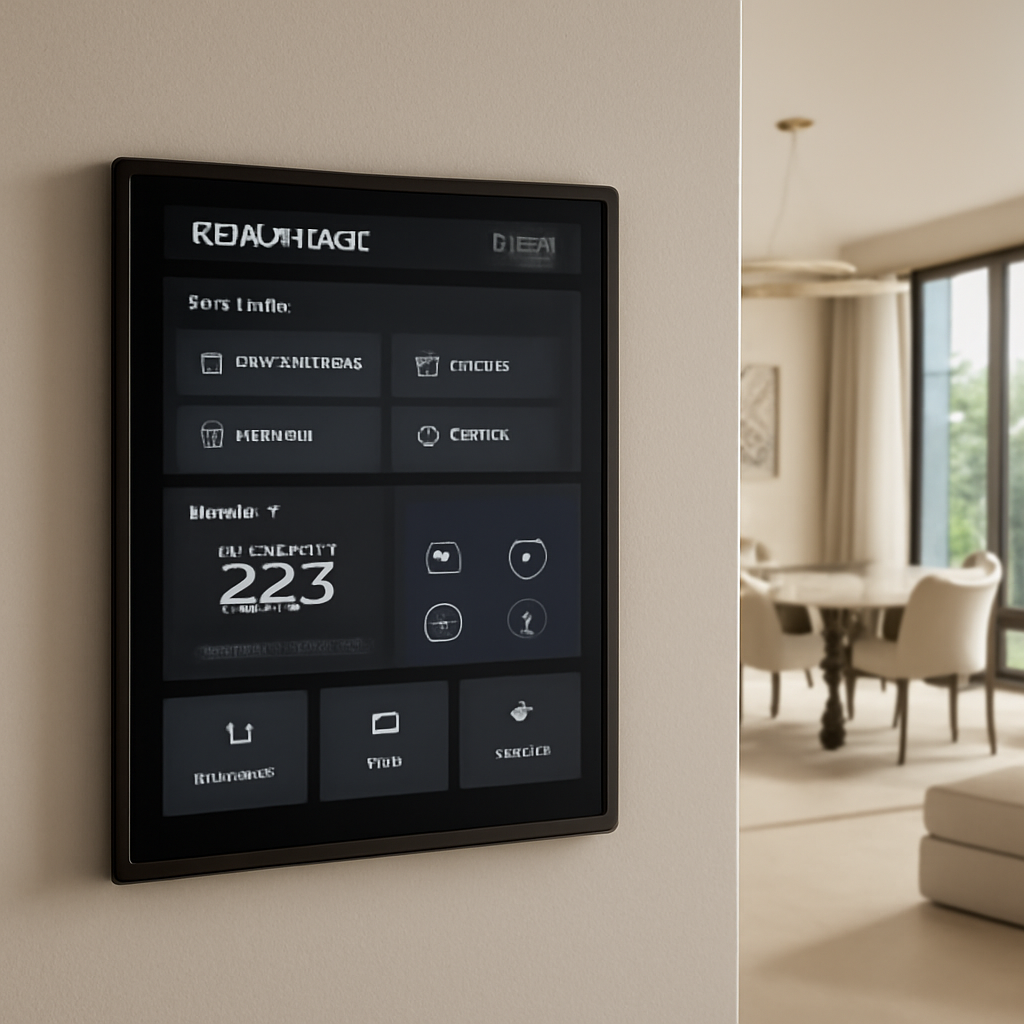
Once you have the right unit, the real magic starts. Install the thermostat in a central, high‑traffic area—ideally the living room or foyer—so it captures ambient changes accurately. Connect it to your home network, and pair it with the Smart Citizens mobile app. This gives you instant alerts if temperatures stray from your set points.
Need a productivity boost while you’re configuring the system? Try a quick 25‑minute Pomodoro session to stay focused. We found that using a timer keeps you from over‑engineering the setup and helps you hit your goals faster. For a solid list of Chrome extensions that can make the process smoother, check out the Top 5 Pomodoro Timer Chrome Extension Picks to Boost Your Focus.
Finally, test the system in real‑world conditions: walk through the house at different times of day, note any lag or sensor glitches, and tweak the settings. A well‑calibrated smart thermostat doesn’t just save energy; it turns your home into a calm oasis that feels like home, not a high‑tech lab.
Ready to ditch the old thermostat and step into a smarter, more comfortable lifestyle? Let’s get started on designing a system that works for you.
TL;DR
TL;DR: Smart home installation in Dubai blends local climate savvy, energy efficiency, and premium aesthetics. Pick a Wi‑Fi thermostat, position it centrally, connect to the Smart Citizens app, then test for lag. A calibrated system saves money, boosts comfort, and turns your villa into a smart oasis, and long‑term support.
Step 1: Define Your Smart Home Goals and Budget
So you’re ready to turn that villa into a smart oasis, but the first thing that sticks in your mind is the budget. It’s like planning a trip: you know where you want to go, but you need a ticket first. The same goes for smart homes.
Start by sketching out the big picture. Ask yourself: What do I want the system to do? Do I need automated lighting, climate control, a security camera, or a mix of all three? Write down the three must‑have functions and the two nice‑to‑have ones. This simple list keeps the conversation focused.
Identify Pain Points
Think about the moments that frustrate you the most. Maybe the AC never hits the right temperature, or you forget to lock the door when you’re in a rush. Pinpointing these pain points turns vague “I want convenience” into concrete goals.
Set Realistic Budget Bands
The cost of a smart home in Dubai is surprisingly flexible. According to the latest market insights, a basic setup starts around AED 5,000 and can go up to AED 10,000, depending on device quantity and installation complexity. A simple lighting loop might cost just a few thousand, whereas a villa‑wide climate and security network could exceed AED 15,000 when you add professional wiring and system integration.
For a quick sanity check, allocate roughly 20-30% of your total project budget to labor—think AED 2,000 to 5,000 for a small setup, or up to AED 10,000 for a full‑fledged villa.
Prioritize ROI‑Focused Features
Smart thermostats, for example, can shave 10-15% off your cooling bill each season. LED smart lighting can cut electricity use by up to 30%. If you’re in a gated community, a smart intercom or doorbell adds security and a premium feel that boosts resale value.
These numbers aren’t just hype—they’re backed by a recent guide that found properties with integrated smart systems command 15-20% higher rental yields in Dubai’s competitive market. A quick read this guide shows how energy savings and convenience translate into tangible financial gains.
Map Your Daily Routines
Imagine it’s a sunny afternoon: you’re lounging, the AC is still off, and the lights are bright. With a smart system, you can program a “sunset” scene that dims the lights and nudges the temperature down by 2°C. Write a simple daily schedule—morning, afternoon, evening, night—and match it to device triggers.
Do a quick “walkthrough” by standing in each room and noting where you’d want a sensor, switch, or camera. This field‑trip saves you from buying unnecessary modules later.
Keep Expansion in Mind
Smart homes are modular. Start with a core—maybe a thermostat and a few smart bulbs—and plan for future additions. Choose platforms that support over‑the‑air updates and mesh networking, so adding a new curtain motor or a water leak detector doesn’t require a full overhaul.
Action Checklist
- List top 3 pain points and 5 desired outcomes.
- Set a budget range and allocate 20-30% for installation.
- Prioritize high‑impact devices (thermostat, lighting, security).
- Draft a daily routine schedule for device triggers.
- Sketch a floor plan with potential sensor locations.
- Choose a scalable platform that supports future expansions.
Remember, the goal of this step is not to get everything perfect on the first go. It’s about building a solid foundation that lets you add smart layers as you learn what works best for you and your family.

By clarifying what you truly want and how much you’re willing to invest, you set the stage for a system that feels natural, efficient, and—most importantly—fits your lifestyle. The next step is choosing the right devices and installers that bring that vision to life.
Step 2: Choose the Right System Architecture and Key Devices
When you’re ready to move beyond the idea of a single smart thermostat, you’re staring at the brain of your villa – the system architecture. Think of it as the plumbing in your house: if it’s crooked, the water never flows right. The same goes for a smart home. A solid architecture lets you add lights, cameras, curtain motors, and even energy‑monitoring sensors without tearing down walls later.
First, pick a platform that can grow. A mesh Wi‑Fi backbone is a must in Dubai’s high‑rise villas; it keeps the signal alive in every corner, even under thick plaster or double‑glazed windows.
For a detailed walkthrough of the four stages, see the ALAYOUBI guide.
What to look for in an architecture
• Reliability – the core must stay online for 24/7.
• Scalability – you’ll probably start with a handful of devices and later add a home theatre system or smart irrigation. The platform should support over‑the‑air updates and modular expansion.
• Security – every low‑voltage cable and Wi‑Fi channel should be encrypted. Look for certifications from the Telecommunications Regulatory Authority (TDRA).
Choosing the right devices
You’ll want devices that “just work” with the chosen architecture. For lighting, Lutron or Philips Hue bulbs pair easily with most controllers and give you dimming plus color temperature control. If you’re after energy monitoring, a smart meter that feeds data into the same hub keeps your dashboard tidy.
For climate, the thermostat you installed in Step 1 should be the hub’s primary voice. A Nest or Ecobee model that supports voice commands and learning schedules can reduce your cooling bill by 10‑15% over the first year.
Security cameras and doorbell cameras are a must if you live near a busy intersection. Pick models with local storage options so you don’t rely on a cloud subscription that might cost extra every month.
Real‑world example: Villa on Jumeirah Beach
We helped a developer set up a 5‑room villa with a single‑room cinema, automated blinds, and a rooftop garden irrigation system. By starting with a Zigbee mesh and a central controller that supports both Zigbee and Wi‑Fi, we avoided the need to run new cables for the garden nodes. When the owner wanted to add a second camera later, the system accepted it without a firmware upgrade.
So, what’s the next step? Pull a floor plan, mark where you want sensors and switches, and map out the power feed. Then, list the devices you need now and the ones you might want later. A simple spreadsheet that tracks “current” vs. “future” will keep you from buying a second set of cables later.
Here’s a quick checklist you can copy into your project plan:
- Define core hubs and their firmware versions.
- Identify critical zones – living, kitchen, bedroom, garden.
- Choose devices per zone that share protocols (Zigbee, Z-wave, Wi‑Fi).
- Allocate a buffer of 20% spare ports for future devices.
- Document power load and safety compliance with local codes.
Once you’ve got the list, it’s time to talk to the installer. A certified technician will confirm the wiring diagram, check the router’s placement for optimal coverage, and run a baseline test. The goal is a system that behaves like an extension of your home, not a box of gadgets.
Let’s be realistic: a mis‑chosen architecture can cost you both time and money. If a hub fails, you’ll need to replace it and re‑program every scene. That’s why, in Dubai, many clients partner with a single company that handles the entire stack – from planning to post‑install support. It’s an extra layer of peace of mind.
Now that you’ve scoped the architecture, you’re ready to dive into the actual device selection and wiring. In the next step, we’ll walk through a detailed installation checklist that turns theory into a living, breathing system.
Watch this quick overview of a typical smart home architecture rollout in Dubai:
We’ll break it down in the next section, but for now, keep that architecture diagram handy. It’s an extra layer of peace of mind.
Step 3: Coordinate Professional Installation and Compliance
Now that the blueprint is sketched and the gear is chosen, the real magic happens when the hands of a certified installer meet the wires. Think of it as a dance: every step, if off, throws the whole routine off.
Why a Pro Makes All the Difference
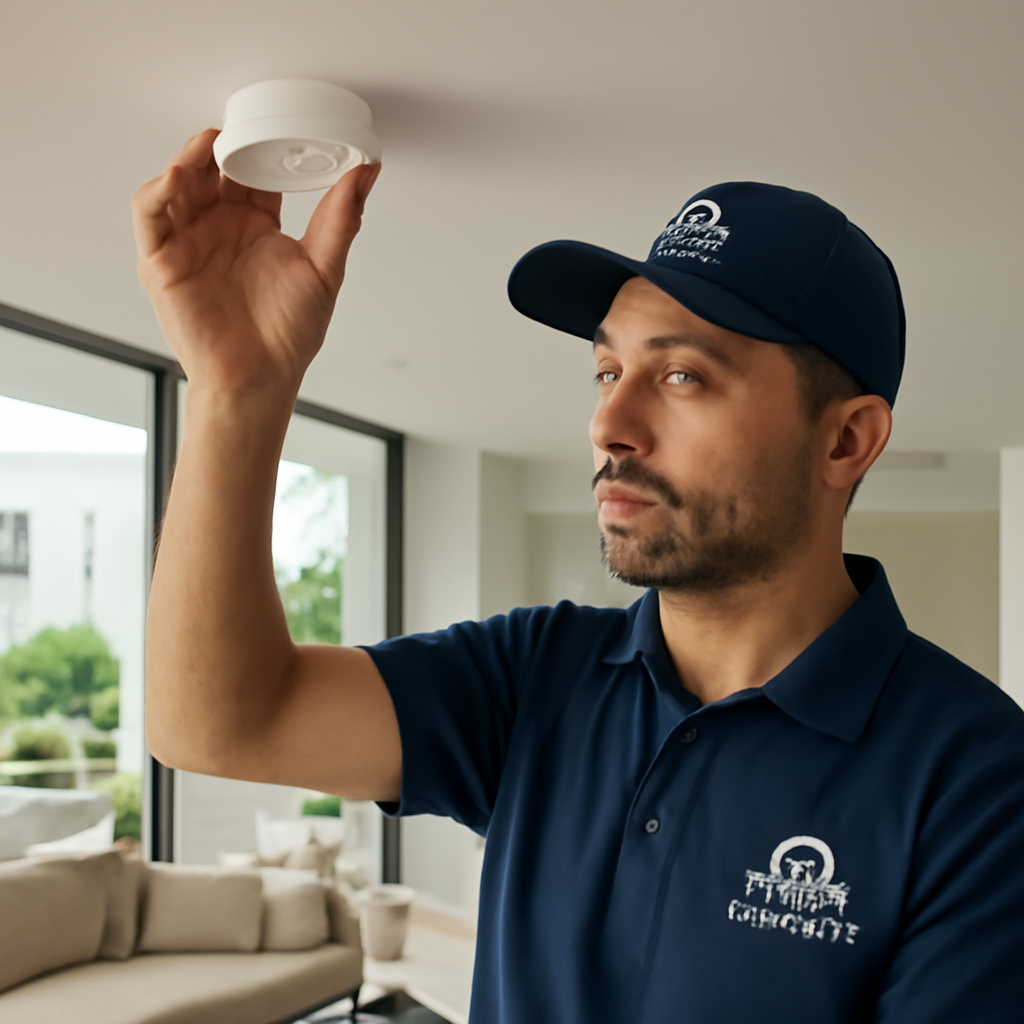
Smart homes are a patchwork of sensors, hubs, and network gear. A mis‑wired thermostat can leave the AC humming at 27°C, and a poorly routed Zigbee mesh will make your living room lights flicker at the worst time. A professional installer checks the wiring diagram, confirms the power load, and tests each node before the curtains even open.
In Dubai, where building codes evolve as quickly as the skyline, a licensed technician knows the latest TDRA regulations and can secure the necessary permits. This stops headaches later, like a sudden shutdown because a conduit wasn’t rated for the temperature range.
Action‑Ready Checklist for the Install Day
- Confirm the installer’s license and TDRA compliance.
- Review the site survey and floor plan to ensure every sensor has a clear path.
- Ask for a baseline performance test: Wi‑Fi strength, battery life of sensors, and latency.
- Check that the hub is placed centrally; a wall‑mounted unit in the hallway often beats a corner placement.
- Verify that all firmware is up‑to‑date before the first switch is flipped.
These steps sound tedious, but they’re the safety nets that keep your system running smoothly for years. Skipping them can mean having to patch a hub three months down the line because the mesh didn’t cover the second floor.
Real‑World Example: A Jumeirah Beach Villa
One client had a sprawling villa with three levels and a rooftop terrace. The installer first mapped each floor’s Wi‑Fi coverage with a signal meter. The original plan would have left the terrace blind; the technician rerouted a small Ethernet line to a dedicated access point. The result? Seamless voice control from the balcony and zero dead zones when guests stayed overnight.
During the baseline test, a motion sensor in the hallway registered a false trigger because of a passing car outside. The installer swapped the sensor’s placement to a shaded spot and recalibrated sensitivity. That tiny tweak saved the client from a nightly “alarm” pop‑up that would have been a major annoyance.
Compliance – Not Just a Checkbox
Dubai’s building authority demands that any new smart system be registered under TDRA’s smart home approval process. The installer submits the system’s technical dossier, including the manufacturer’s safety certifications and the final wiring diagram. Once approved, the system earns a “TDRA Certified” seal – a badge of reliability for homeowners and future buyers.
Many clients wonder if this bureaucracy slows them down. In reality, the approval step is quick – about 48 hours – if the installer follows the checklist above. It’s worth the wait because it protects your investment and gives you peace of mind.
Post‑Installation Support: The Hidden Gem
Installation is just the opening act. A reputable installer offers a follow‑up visit within 48 hours to run a full system check. They’ll tweak scene timings, re‑map motion zones, and upload a backup of the configuration to the cloud. Some even provide a 12‑month monitoring service, alerting you to firmware updates or security patches.
For owners who want to stay hands‑on, a simple user guide is handed over. It explains how to add new devices, change scene colors, and troubleshoot the most common hiccups. The installer also shares the contact number for quick help – no more wandering through forums or calling a random support line.
Remember: the smartest system is one that feels like an invisible helper rather than a gadget army. By investing in a certified installer, you’re not just buying a service; you’re securing a partnership that will evolve with your home.
Think about the last time a DIY smart project stalled because of a wiring mishap. Wouldn’t it be great to skip that? With a pro in the room, you can focus on the lifestyle gains – a dimmed sunset scene as you sip your tea, or a secure doorbell notification that keeps you aware of visitors. That’s the real value of coordinated installation and compliance.
Ready to book your professional installation? A quick consultation will set the stage for a hassle‑free rollout and a future‑proof smart home.
Step 4: Compare Leading Smart Home Platforms in Dubai
So here we are, staring at a list of platforms that promise to turn your villa into a tech‑savvy playground. The real question is: which one actually fits the heat‑stubborn climate, the strict TDRA rules, and your budget? Let’s unpack the options that keep the local installers humming.
First up, KNX. It’s the Swiss army knife of building automation. The protocol runs on wired networks, giving you rock‑solid reliability even when Wi‑Fi hiccups. For a luxury villa, the upfront cable work can cost a bit more, but the long‑term stability is worth it. Homeowners love that your lights, blinds, and HVAC are all talking on the same tongue without latency.
Next, we have Zigbee. It’s the wireless cousin of KNX, but with mesh support that keeps your signal alive in the thick plaster of Dubai homes. Zigbee hubs are cheaper than KNX controllers and work with a huge ecosystem of bulbs, locks, and sensors. The catch? You need a gateway that can stay online 24/7 and be TDRA‑certified if you’re using it for security or HVAC control.
Then there’s Google Home / Nest ecosystem. It’s perfect for those who want voice control that feels natural. The downside in Dubai is that Nest devices rely on a stable internet connection, and any Wi‑Fi drop can throw a wrench into the scene. It’s great for light‑touch automation, but if you’re chasing full integration with a smart intercom or a motorised curtain system, you’ll need to pair it with another hub.
And finally, Apple HomeKit offers tight security with built‑in encryption, plus a smooth app experience if you’re an iPhone user. HomeKit’s limitation is that the device library is smaller than Zigbee’s, especially for niche HVAC or irrigation products. However, if your villa already houses a lot of Apple gadgets, HomeKit can be a low‑friction upgrade.
So, how do you decide? Start with what you’re already invested in. Do you have an Apple ecosystem? Go HomeKit. Need a robust, wired backbone? KNX is the way. Looking for a cheap, flexible mesh that scales as you add more sensors? Zigbee. Want a voice‑first experience? Nest.
Here’s a quick snapshot to help you weigh the options side‑by‑side:
| Feature | KNX | Zigbee | Google Home (Nest) | Apple HomeKit |
|---|---|---|---|---|
| Installation Type | Wired, high‑cost upfront | Wireless mesh, moderate cost | Wireless, app‑centric | Wireless, app‑centric |
| Device Ecosystem | Limited but premium brands | Wide, includes smart bulbs, locks, sensors | Wide, strong voice integration | Apple‑centric, growing third‑party support |
| Security & TDRA Compliance | Highly secure, easy to certify | Requires certified gateway for security use | Depends on internet security; not ideal for critical security | Built‑in encryption, but device list limited for security |
| Scalability | Excellent for large estates | Great mesh expansion | Good, but requires consistent Wi‑Fi | Good, but device limits can hit |
Remember, the platform is just the foundation. The real magic comes from how the devices are wired into that foundation and how the installer keeps the network humming under the Dubai heat. In our experience, a hybrid approach often works best: KNX for core HVAC and security, Zigbee for lighting and curtains, and a Nest hub for voice control.
Once you’ve narrowed it down, talk to a certified installer who can map out the wiring and confirm TDRA certification for the chosen hub. Don’t let the promise of a “plug‑and‑play” system fool you—Dubai’s building codes demand meticulous documentation.
Curious about what other developers are choosing? Check out this overview of Dubai’s smart home landscape for a broader view of industry trends.
Now that you’ve seen the options laid out, it’s time to pick the platform that fits your style, your budget, and the local regulations. And if you’re still stuck, schedule a free consultation with us—we’ll walk you through the decision in a coffee‑shop chat style, no jargon, just clear next steps.
Step 5: Optimize Energy Usage and Security Post‑Installation
After the lights flicker on and the thermostat clicks into place, the real work begins: making sure the system actually saves you money and keeps you safe. It’s like installing a new kitchen appliance—if you don’t dial in the settings, you’ll spend more energy and miss out on the perks.
We’ve seen clients come back after months, wondering why their bill didn’t drop. The answer? Their devices were running on default schedules that didn’t match their lifestyle. That’s why the first step is a quick audit of each zone’s energy profile.
Fine‑Tuning Energy Settings
Start by mapping each room’s occupancy patterns. If the living room is empty after 8 pm, set the HVAC to a mild 25°C there. Use the system’s scheduling feature to create a “night‑time” profile that drops the temperature by 2°C and dims lights to a 20% level.
Don’t forget the blinds. Motorised curtains can cut heat gain by up to 30% when set to close at noon. Pair that with a daylight sensor that pulls the curtains automatically; no extra app calls, just a smarter wall.
Layering Security Post‑Installation
Once the HVAC and lighting are humming, shift focus to security layers. A smart intercom that feeds video to your phone is great, but without a motion‑triggered notification, you’re still blind to intruders. Set up a two‑stage alert: a local alarm that sounds on your home speakers, and a push notification that lands in your inbox.
For high‑end villas, consider a perimeter camera that uses face‑recognition to distinguish residents from strangers. Even if the tech feels high‑tech, the logic is simple: when someone walks past the driveway, the camera tags their face and sends a photo to the homeowner’s device.
Automated Energy Monitoring
Now that you’ve got the scenes set, install a smart meter that feeds data directly into your hub. Look for a model that shows real‑time wattage per circuit. With that data, you can spot a rogue heater that’s on 24/7 and cut it in half without manual tweaks.
Use the dashboard to set alerts. If power dips below a threshold, the system can auto‑switch to a backup battery or reduce lighting dimmer levels. The result? A consistent energy baseline that you can trust.
Maintenance and Firmware Updates
Energy savings are only as good as the firmware that runs them. Schedule quarterly checks to pull the latest updates for all devices. Most manufacturers push patches that tighten Wi‑Fi security and improve energy efficiency by a few percent.
Keep a log of when each device was updated. It helps you troubleshoot a spike in consumption: if the thermostat update coincides with a surge, you know where to look.
Remember that the goal is a system that feels almost invisible. The lights should dim on their own, the AC should adapt to your schedule, and any breach should trigger a calm, well‑timed alert. If that feels too much like a checklist, think of it as a recipe. Follow the steps, taste along the way, and tweak until it’s just right.
So, what’s the next move? Turn your audit into a maintenance schedule, lock in your firmware updates, and let the data guide your energy choices. The savings compound, and the security layer gives you peace of mind in the heat of Dubai’s summers.
Step 6: Plan for Maintenance, Updates, and Scale
After you’ve wired up your villa, the real magic starts when you keep everything humming. Maintenance, firmware updates, and scaling aren’t optional—they’re the secret sauce that turns a good system into a great one.
Think of your smart home like a garden. You plant the devices, but if you never water, they’ll wilt.
So, what should you do first? Set up a quarterly check‑in calendar. Mark the last firmware date, battery health, and any error logs in a shared spreadsheet. It becomes a quick reference the next time the thermostat complains or the lights flicker.
Keep a version log for every device. A simple table that lists device type, model, current firmware, and last update date turns chaos into clarity.
You’ll wonder why that matters. If a firmware fix drops the AC from 28°C to 27°C, you’ll see a ripple in your bill that adds up over months.
Next, grab a central dashboard that pulls all alerts into one view. Most modern hubs let you set thresholds—so when a sensor’s battery dips below 20%, you get a ping on your phone.
A real‑world example: A client in Jumeirah had a thermostat that kept sending out error codes after a firmware jump. Because their dashboard flagged the spike, we rolled back the update the next day and saved them a potential AED 300 in cooling costs.
Scaling is another puzzle piece. Plan for future sensors before you buy the first one. Allocate extra ports on your hub or keep a spare mesh node handy.
When you add a new room or a garden irrigation system, you’ll want the new node to slot in without a manual firmware push. That’s why choosing a hub that supports over‑the‑air (OTA) updates is essential.
Automate alerts. Most systems can push a text or email when a device goes offline. Set a rule: if a thermostat stops responding for more than 10 minutes, schedule a technician call.
Professional reviews are a good sanity check. Schedule a yearly audit with a certified technician who can run diagnostics, test fail‑over scenarios, and suggest hardware upgrades if needed.
Backing up configurations is surprisingly simple. Most hubs allow you to export a JSON file. Store that file in two places: the cloud and a local USB drive.
When your hub’s firmware reaches end‑of‑life, it’s a signal to upgrade. Don’t wait for a bug—plan the transition during a low‑usage period to avoid a holiday outage.
Security layers should be reviewed as often as your software. If a new vulnerability is disclosed for your doorbell camera, patch it immediately or replace the unit if it’s unsupported.
So, what’s the big takeaway? Your smart home is a living system that needs care, not a set‑and‑forget gadget.
Keep the rhythm simple: check once a month, automate the rest, and invite a pro every year. Then you’ll enjoy a villa that keeps its cool, lights its way, and protects you without you having to lift a finger.
If you’re in Dubai, give us a quick call and we’ll map out your next maintenance step together.
FAQ
1. How do I know if my villa is ready for a smart home installation in Dubai?
Picture this: you walk into a bright living room and the lights dim automatically as you sit. That’s the magic of a ready‑to‑go villa. Start with a quick audit of your wiring and Wi‑Fi reach. If your router can ping every corner without a hiccup, you’re good. Also, check that your building code allows smart devices—Dubai’s TDRA already sets the standard. If you’re unsure, a quick survey from a certified installer can seal the deal.
2. Will my smart thermostat keep up with Dubai’s scorching summer heat?
It can, if you choose the right model. A thermostat with an adaptive learning algorithm senses the heat cycle and pre‑cools before the mercury hits 35°C. Pair it with a robust fan‑coil or a shaded solar‑powered unit. In practice, homeowners in Jumeirah see a 12‑15% cut in cooling bills when the thermostat syncs with their daily routine. The key is firmware that stays current—so keep those updates on schedule.
3. How can I integrate video intercoms without a cloud subscription?
Many systems now ship with local storage options. Opt for a model that writes to an SD card or an internal SSD and uses end‑to‑end encryption for any cloud backup. In a real‑life villa on Palm Jumeirah, we installed a local‑storage intercom that still sends push alerts to the homeowner’s phone, eliminating monthly fees and ensuring zero lag during peak traffic.
4. What’s the best way to keep my smart lighting safe from power surges?
Use surge‑protected outlets and a UPS that can run the hub for at least 15 minutes. For LED strips and smart bulbs, choose brands that offer built‑in over‑current protection. In practice, a 300‑watt UPS on the main panel can keep the lights on during a typical 10‑minute spike. Regularly test the breaker by unplugging a bulb; if it trips, you’ve got a safe circuit.
5. How often should I update firmware on my security cameras?
At least once a month, but most vendors push critical patches within 48 hours of a vulnerability being disclosed. Set an auto‑update flag if the camera firmware supports it. If not, schedule a bi‑weekly check‑in on your phone. In a high‑end villa, a delayed patch can expose a doorbell camera for months—definitely worth the effort.
6. Can I add new smart devices later without re‑wiring?
Yes, if you start with a mesh network. Zigbee or Thread hubs expand by just plugging in a new node; the system learns the path automatically. For a 4‑story villa, a single mesh node on each floor can cover the whole house. In our portfolio, a client added a new irrigation system last year without touching the original wiring—just a quick firmware sync on the hub.
7. What should I do if my smart home keeps glitching during the night?
First, check the motion sensor placement. A sensor too close to an outdoor window can pick up passing cars. Move it a few feet away and adjust sensitivity. Next, look at the Wi‑Fi channel—if it’s crowded, switch to 5 GHz. Finally, run a diagnostic from the hub app; it’ll list any devices stuck in a firmware loop. Fixing these three points often eliminates the nightly pop‑ups.
8. How can I get a backup of my smart home settings without using the cloud?
Export the configuration to a JSON file from the hub’s web interface. Save that file on a USB stick and keep a copy in a secure offline vault. If you ever need to restore, just plug the stick in and upload the JSON. In a recent case, a Dubai family avoided a 24‑hour outage by restoring from an offline backup after a power surge corrupted the cloud copy.
Conclusion
When you wrap up a smart home installation, the real win is the everyday calm that follows.
You’ve moved from a bunch of gadgets to a system that listens to you.
So, what should you do next? Keep the rhythm simple: schedule quarterly checks, update firmware, and keep that backup JSON on a USB.
A tiny tweak—resetting a sensor, or adding a new room—can prevent a cascade of glitches that would otherwise feel like a nightly alarm.
In Dubai’s heat, that reliability translates to real savings: a 10‑15% drop in cooling costs when your thermostat learns your routine.
And remember, Smart Citizens’ team is ready to help you fine‑tune the experience—no hard sell, just a friendly tweak.
Ready to turn the next corner? Book a quick, no‑obligation survey, and let us map the next steps for your villa.
Think about the last time a smart thermostat slipped a degree and you woke up in a sauna. That’s the kind of small comfort that keeps you coming back.
If you’re curious about how others keep their systems humming, a simple checklist can give you a clear roadmap: test coverage, backup plan, and update schedule.